Contact Us

Use the form on the right to contact us.

You can edit the text in this area, and change where the contact form on the right submits to, by entering edit mode using the modes on the bottom right. 


123 Street Avenue, City Town, 99999

(123) 555-6789

email@address.com


You can set your address, phone number, email and site description in the settings tab.
Link to read me page with more information.

CONTENT

Filtering by Category: recipe

Hunt and Gather

Ben Ashby

Screen Shot 2020-10-29 at 1.13.04 PM.png

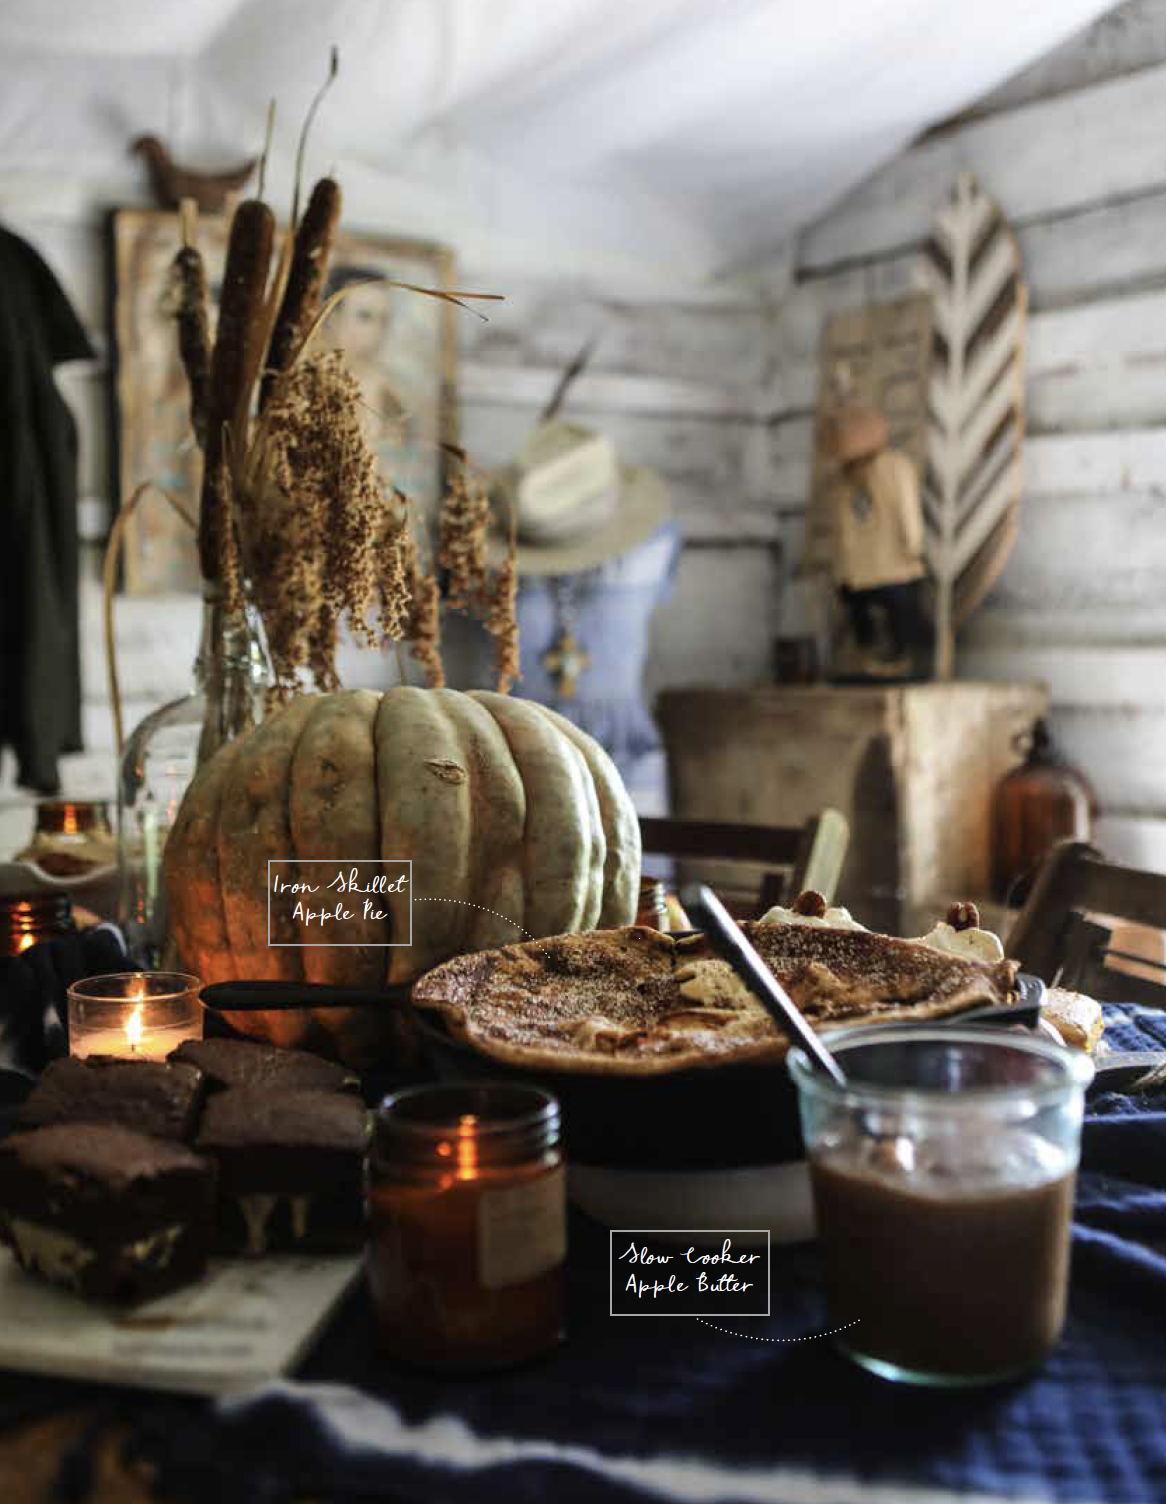
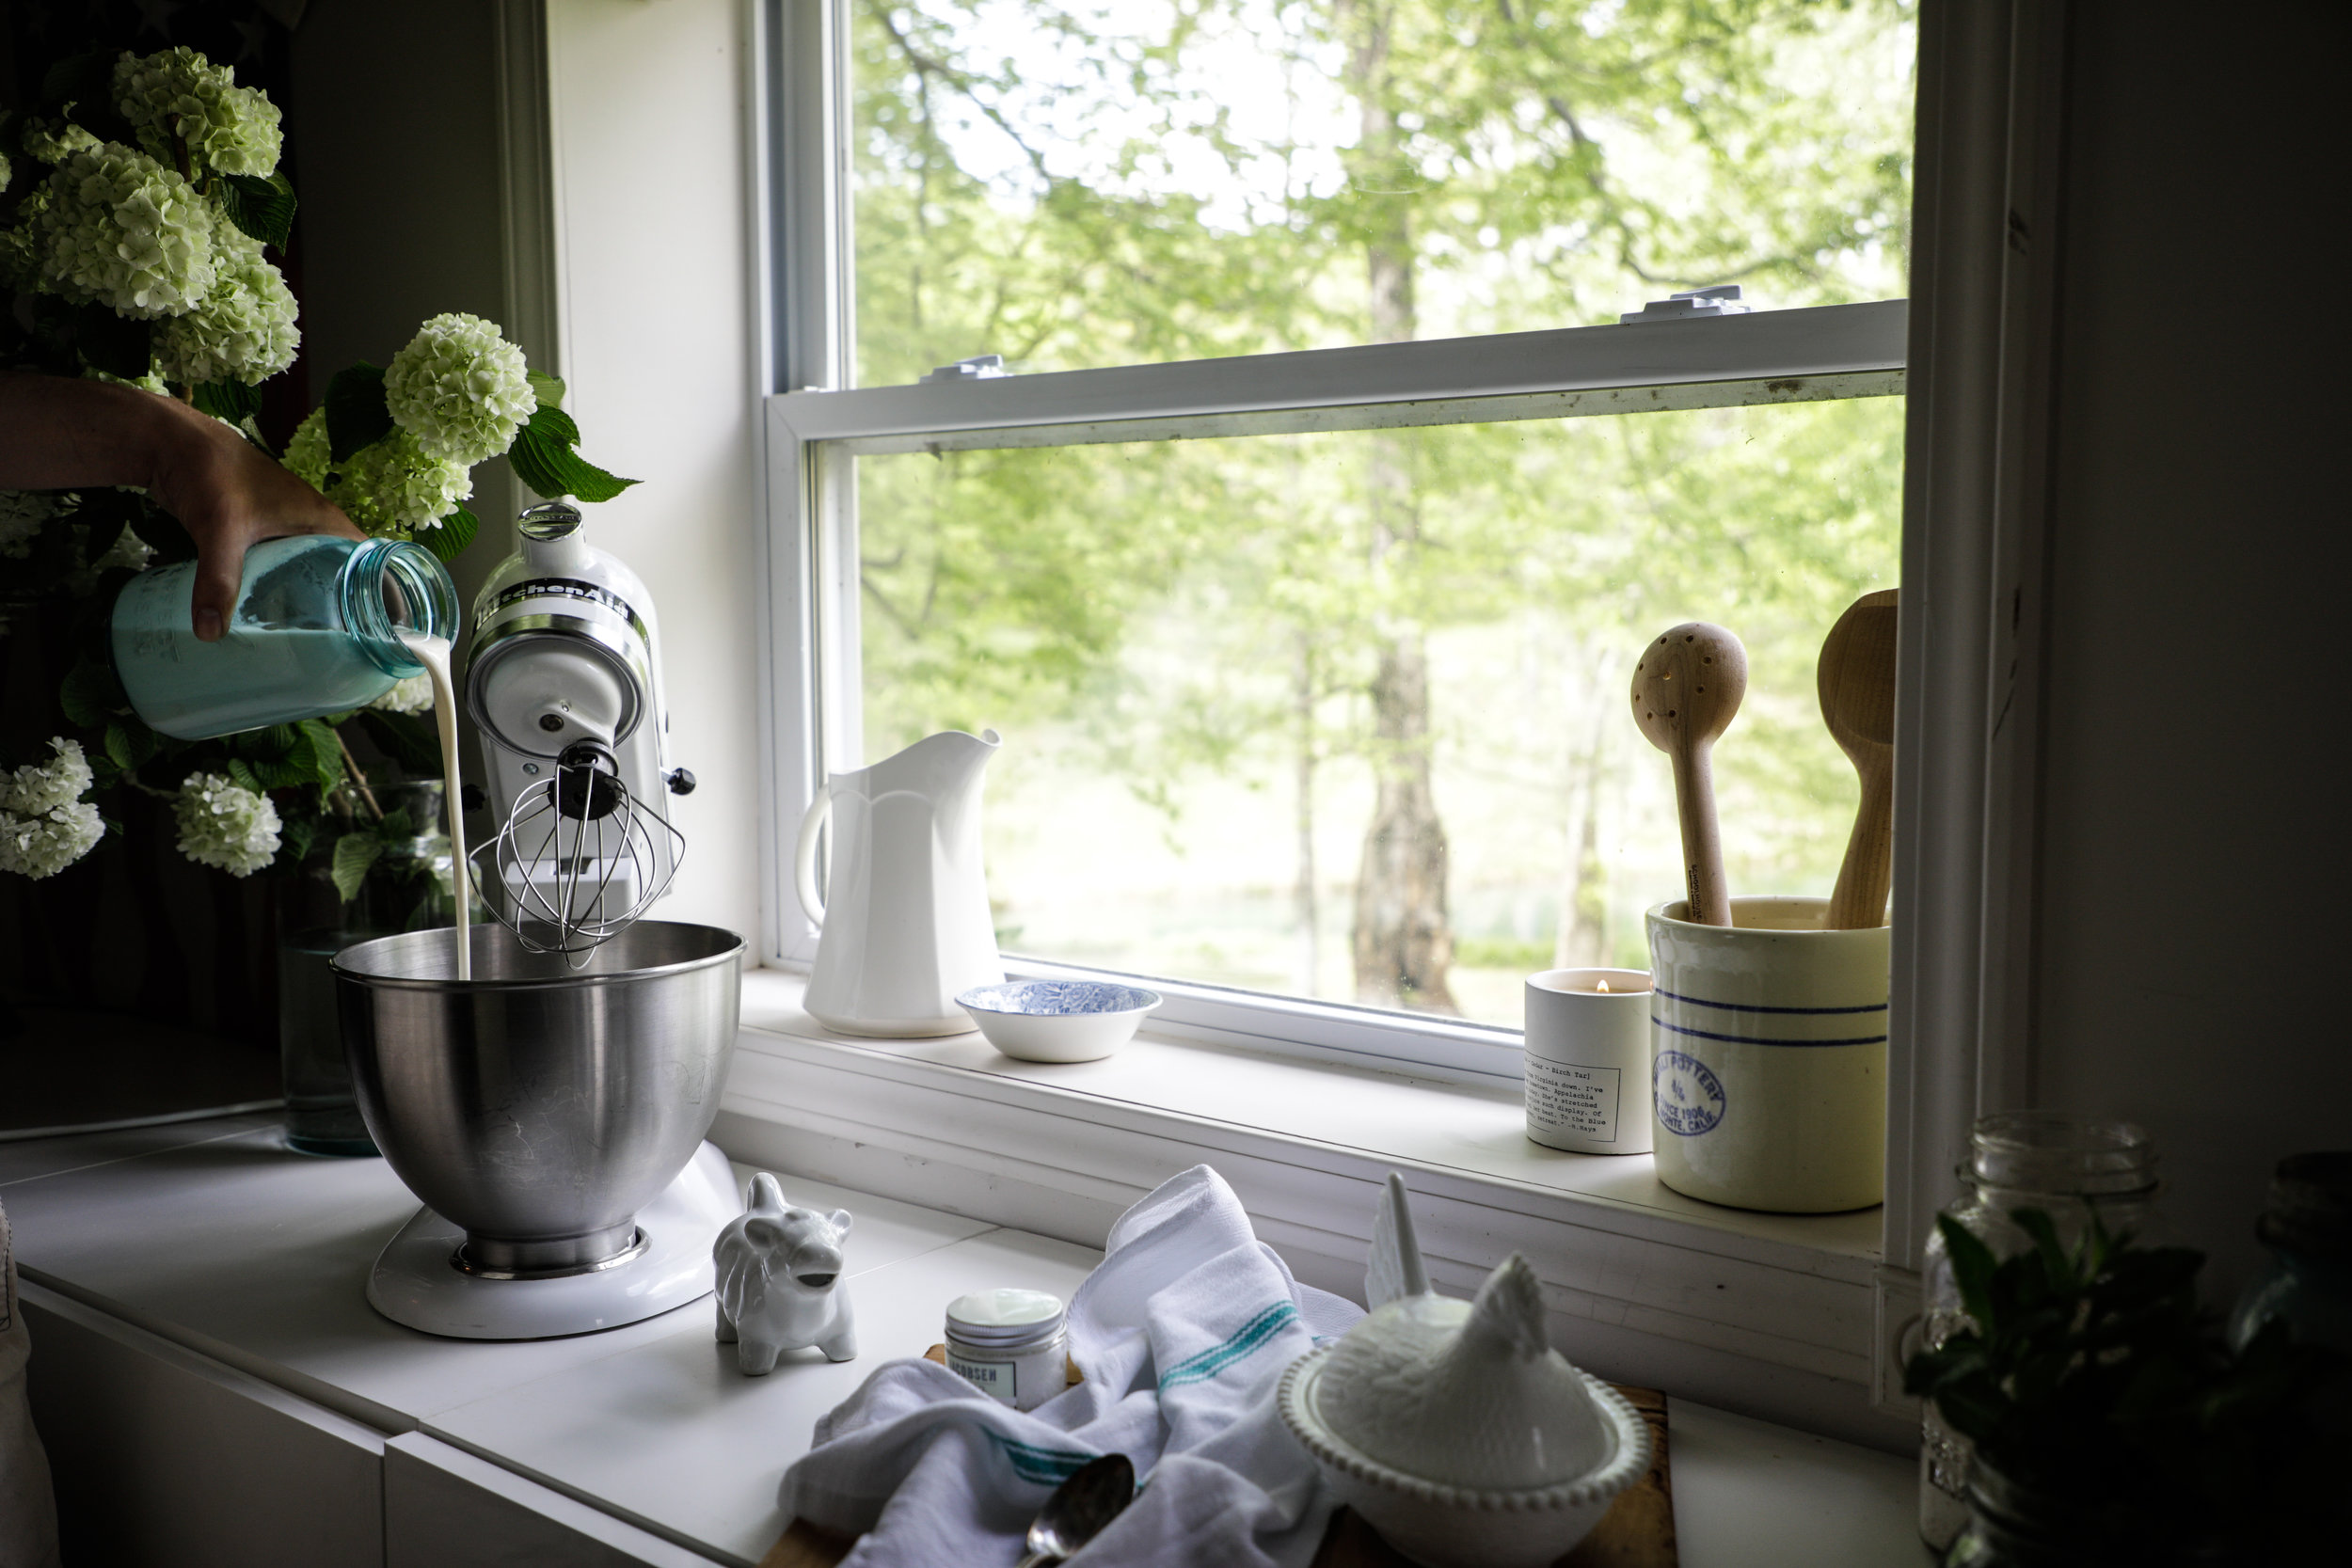
GATHERING OF THE SEASONS. A trio of apple desserts, a fabulous fall arragement, and one stellar location come together to create a fete for the fall. Designer Evan G. Cooper creates a memorable fall gathering perfect for the southerner or the rustic lover in us all. This story is from October 2012.
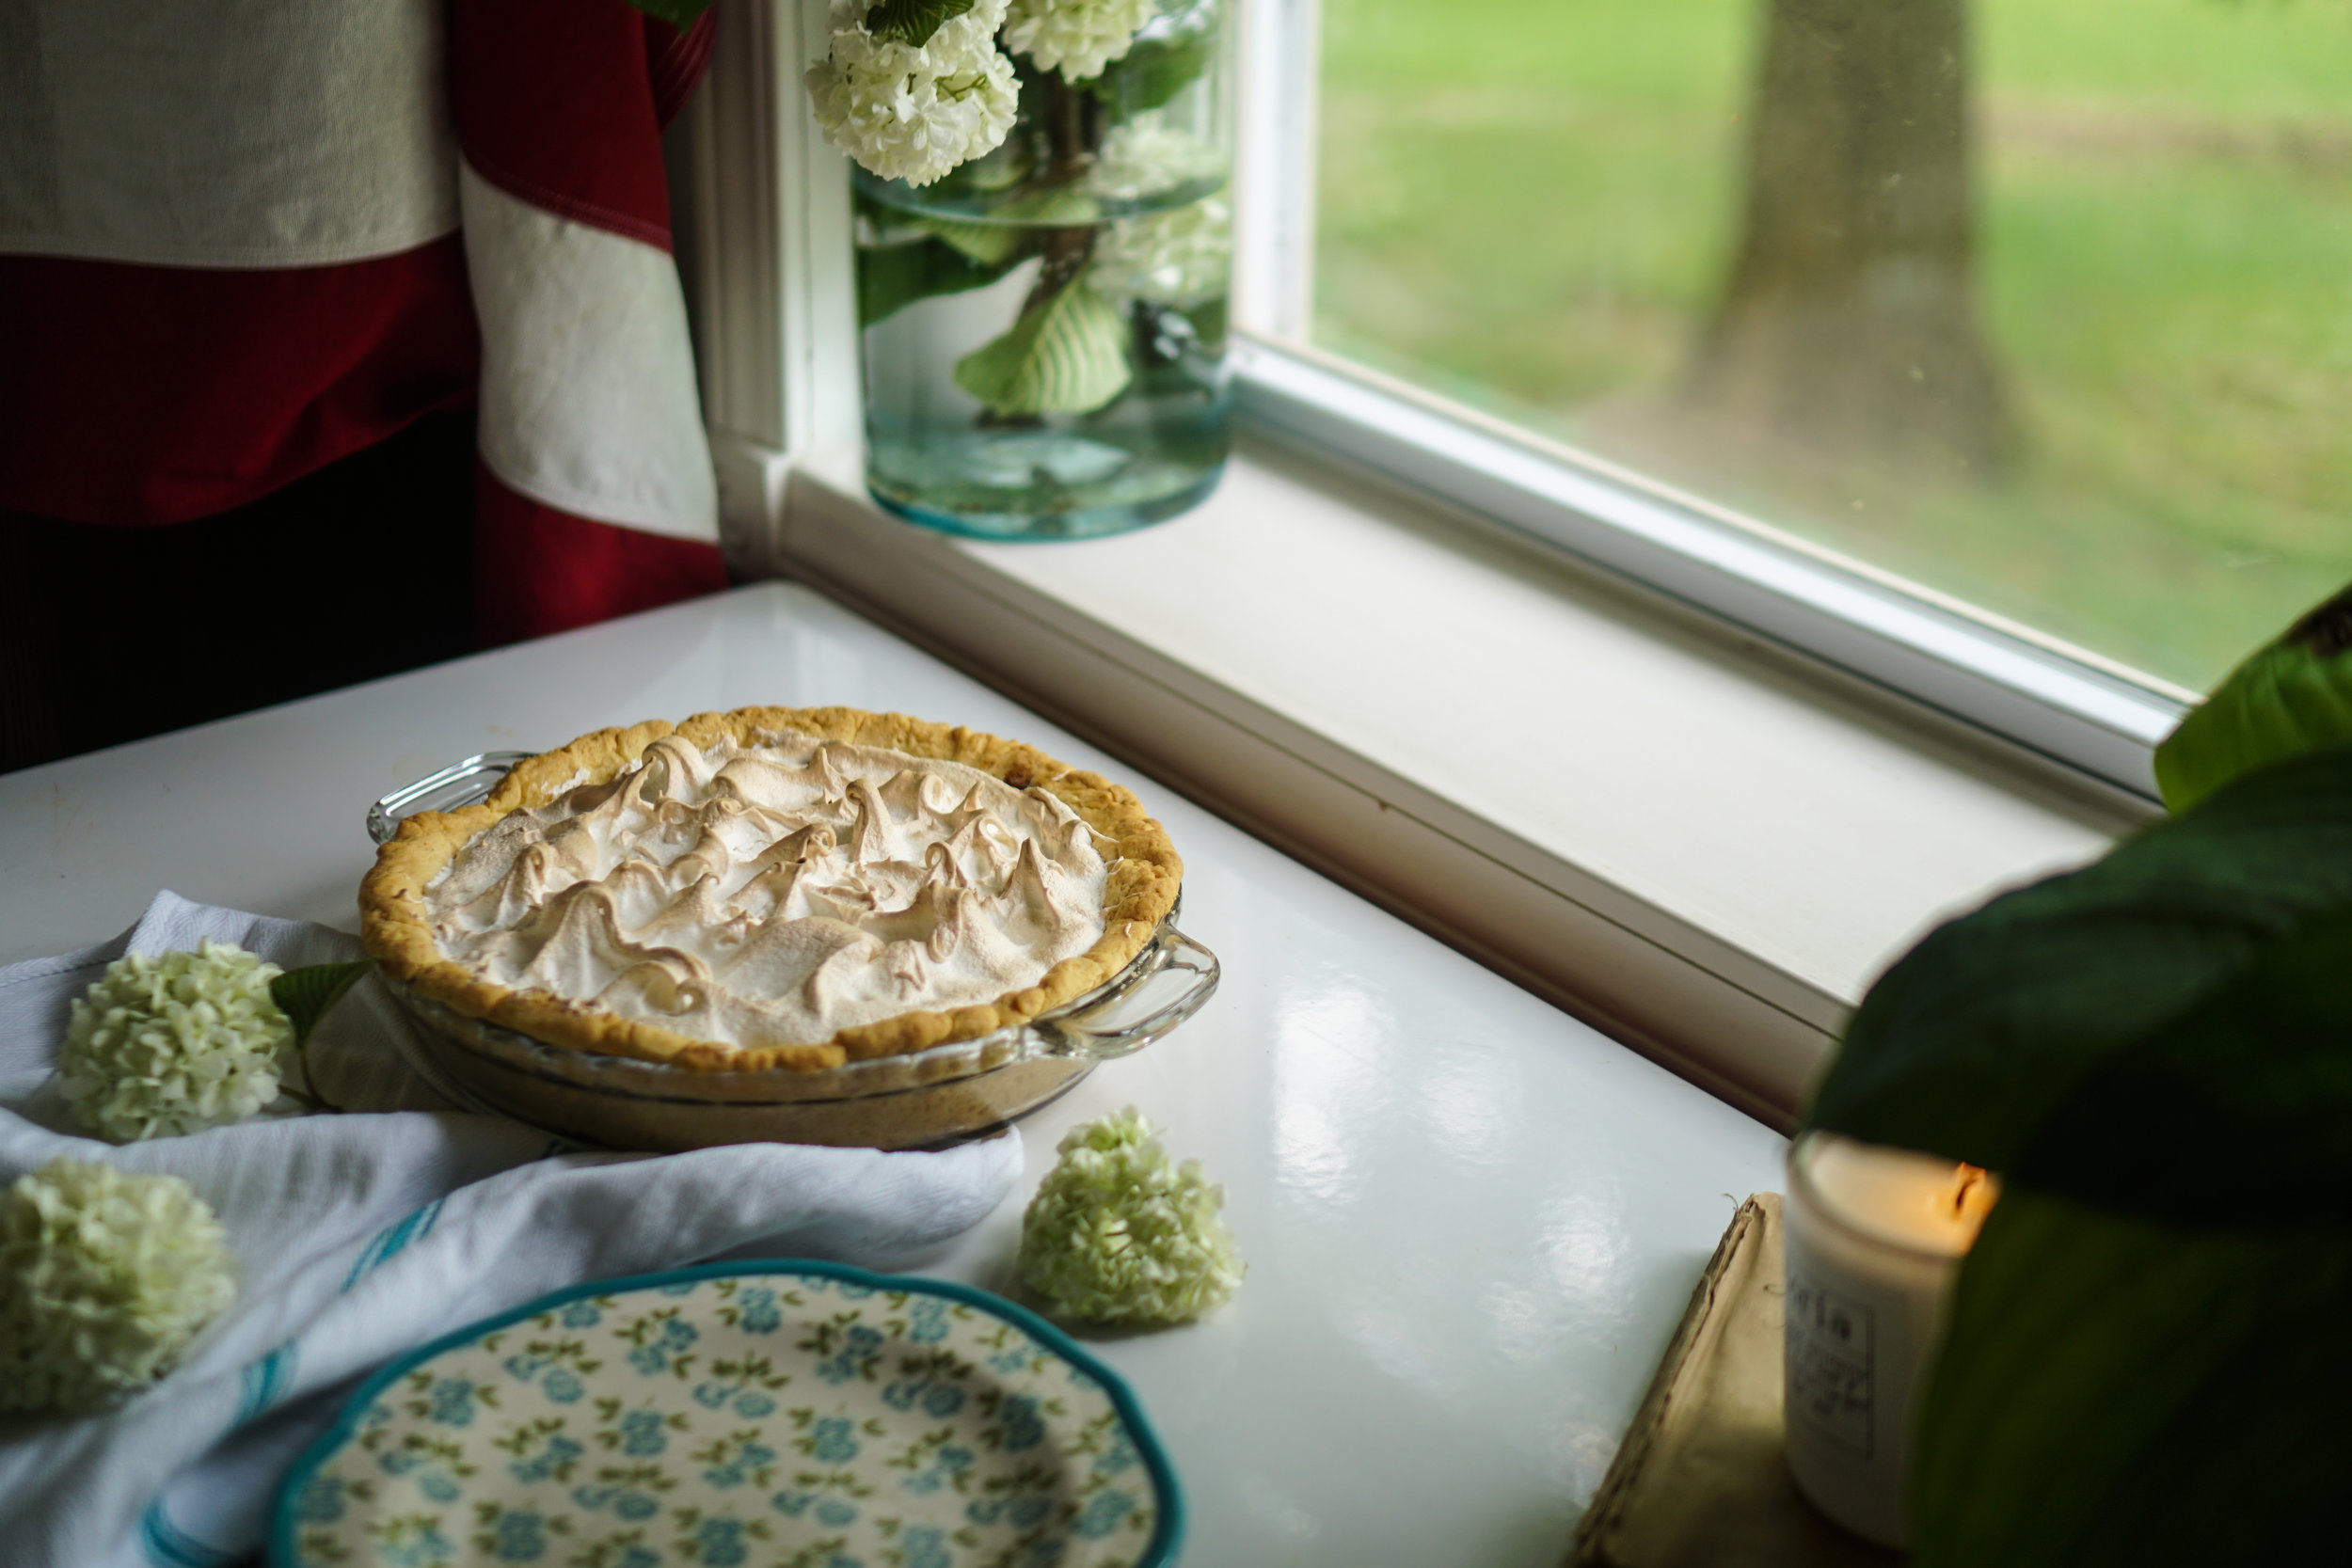


Screen Shot 2020-10-29 at 1.12.43 PM.png

Apple Pie

8 sweet apples, peeled, sliced, and cored
1 cup sugar
2 teaspoons ground cinnamon, or to taste

2 1/2 tablespoons all-purpose flour

1 teaspoon ground nutmeg
Pinch of salt
2 tablespoons butter

2 unbaked pie shells

Preheat oven to 400 degrees.
In a mixing bowl, combine sugar, cinnamon, flour, nutmeg, and salt; mix thoroughly. Pour the spice mix over

the apples and stir until the apples are coated. Line one crust in a 9 inch deep dish pie pan. Place the apples in the pie crust. Dot the apple filling with butter. Cut the second pie crust into strips. Creating a lattice pattern starting from the center cover the pie with the strips. Press the crust down gently and cut four slits in the top crust to allow steam to escape while the pie bakes Bake in the preheated oven one hour or until the crust is golden brown. Check the pie after the first

30 minutes of cooking: if the crust is already browned reduce the heat to 350 degrees to allow the apples to cook without the crust burning.


Screen+Shot+2020-10-29+at+1.12.23+PM.jpg

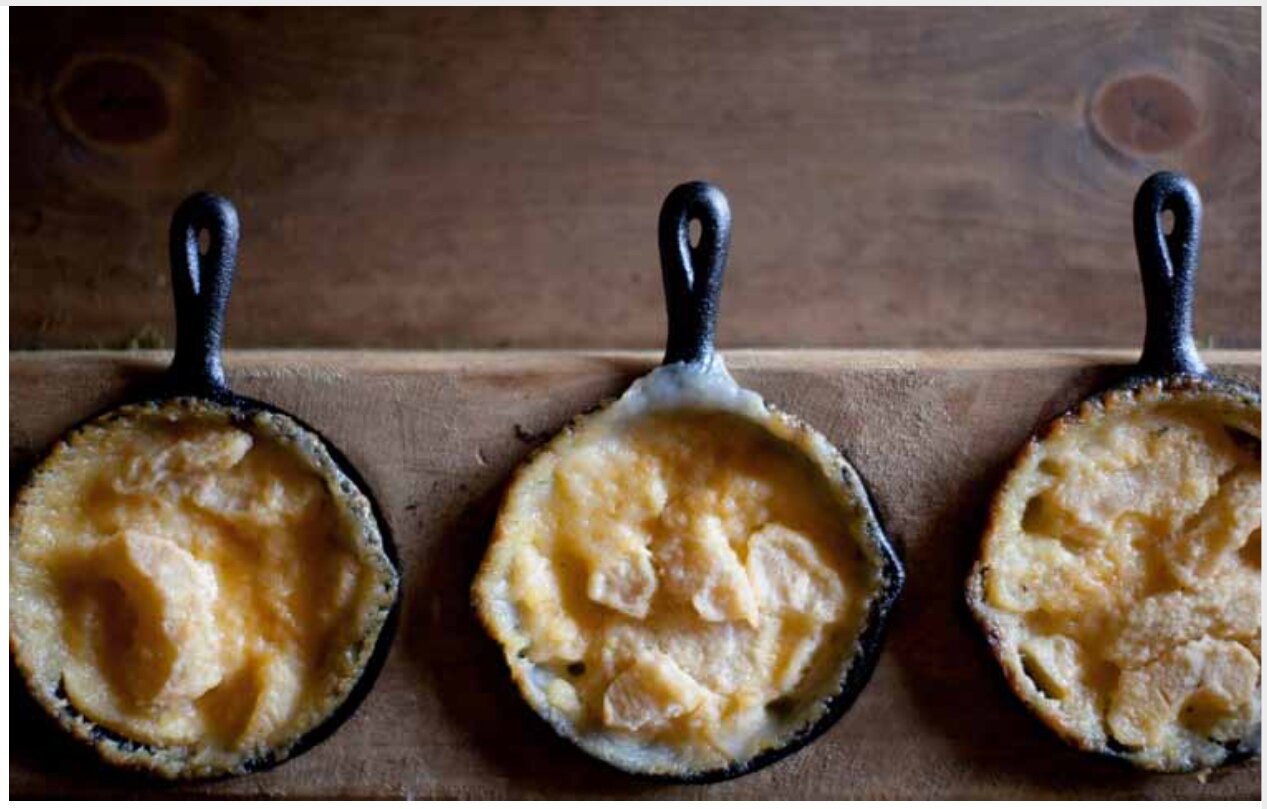
Red’s Apple & Cheese Casserole

2-3 lbs fresh apples, cored, peeled, and sliced

1 1/2 cups water
3/4 cup sugar
1 1/2 pounds of sharp cheddar

4 cups sugar

3/4 cup melted butter

3 cups flour
2 cups milk

Combine 1st 3 ingredients in skillet, cook on medium-low heat until apples are semi tender (they will continue to cook in casserole). In bowl combine remaining ingredients. Drain cooked apples, stir into bowl, and then pour into greased casserole dish. Cook at 300 degrees until firm and golden.


Screen Shot 2020-10-29 at 1.13.20 PM.png

Apple Filled Puff Pastry

1 package puff pastry
3 apples, peeled cored, and sliced 1/2 cup packed brown sugar
3 teaspoons flour
3/4 teaspoon lemon juice
1 teaspoon cinnamon
1 teaspoon nutmeg
1 beaten egg

Thaw puff pastry. Heat oven to 350°F. Peel, core and chop apples up coarsely.. Combine apples with sugar, flour, lemon juice, cinnamon and nutmeg. Flour surface lightly and cut pastry sheet into nine 3x3 squares. Place approximately 1/4 cup apple mixture on each square and brush edge with beaten egg. Place second pastry square on the top of the already filled pastry to form a pocket. Press down the border with fingers to seal and then press with fork to decorate the edges. Cut several vents into each pastry. Place on well greased baking sheet and give each one an egg wash. Bake for approximately 20 minutes or until golden.


Screen Shot 2020-10-29 at 1.13.29 PM.png


Stylist: Evan G. Cooper/ Evan & Co.
Photographer: Nick Drollette
Venue: Emerald Mountain Equestrian Club
Assistants: Jonny Marsh, Rae Culver/ LeRae Events + Design Rentals: Brendle Rentals

Evan G. Cooper, is a stylist and floral designer with a knack for creating settings filled with southern charm. Rustic or regal matters not when it comes to making his designs full of rich, authentic details. His passion carries over into affections for photography, missions abroad and good ‘ole southern hospitality. He’s right at home in Montgomery, Ala- bama as owner of Evan & Co., an event and floral design company.

6 Pumpkin Recipes You Need Right Now

Katie Westerfield

6 Pumpkin Recipes You Need Right Now

And every fall from now on.

Any excuse to whip out some pumpkin puree I’m here for. These recipes aren’t your momma’s pumpkin pie but still give you that cozy, homey vibe you dream of this time of year. From sweet to savory, your next go-to Autumn recipe is right here. Keep reading for the 6 pumpkin recipes you need in your life.

Pumpkin Mascarpone Pancakes

Eva Kosmas Flores | Adventures in Cooking

Eva Kosmas Flores | Adventures in Cooking

The Kitchen McCabe

The Kitchen McCabe

Platings + Pairings

Platings + Pairings

The Hungry Apron

The Hungry Apron

Two Cups Flour

Two Cups Flour

Twigg Studios

Twigg Studios

Love these recipes and want to see more favorites? Be sure to follow us on Instagram and subscribe to our newsletter to keep in touch.

The Very Best Banana Pudding

Ben Ashby

I love banana pudding. It is the perfect year round dessert. Good for any occasion and somehow perfectly balanced between refreshing and filling. For years I had just made a standard banana pudding, but when I discovered the recipe for the Magnolia Bakery banana pudding I was in love.

This recipe is rich, but oh it is so simple. Like you won’t believe how easy it is. You can make a batch to feed a family for less than $8…way less than the $6 a serving prices at the Magnolia Bakery.

Lets make it!

Farmhouse-1332.jpg

INGREDIENTS

1 (14 oz.) can sweetened condensed milk

1 1/2 cups ice cold water

1 (3.4 oz.) box vanilla instant pudding mix

3 cups heavy cream

4 cups sliced barely ripe bananas (see note)

1 (12 oz.) box Nilla Wafers


PROCESS

n a large bowl, beat together the sweetened condensed milk and water until well combined – about 1 minute. Add the pudding mix and beat well – about 2 minutes. Cover and refrigerate for 3-4 hours or overnight. It is very important to allow the proper amount of time for the pudding mixture to set. It will be watery if you don’t let it set up long enough.

In a large bowl, whip the heavy cream until stiff peaks form. Gently fold the fresh whipped cream into the pudding mixture until no streaks of pudding remain.

To assemble, arrange 1/3 of the Nilla wafers covering the bottom of a bowl or pan, overlapping if necessary. Next, layer 1/3 of the bananas, and 1/3 of the pudding mixture. Repeat twice more, garnishing with additional wafers or wafer crumbs on the top layer. Cover tightly and allow to chill in the fridge for at least 4 hours – or up to 8 hours, no longer...bananas will start to brown.

Hamilton and Adams-1334.jpg


 Jen’s Banana Bread 

Ben Ashby

 Jen’s Banana Bread 

A timeless recipe that feels more like a cake than a bread.

This recipe came to me in the very best way…in 2002 I was sitting at my friend Lori Gibbons’s kitchen table, and she put this in front of me…warm, with a cup of tea. I was smitten. She had tweaked the recipe and shared it. I still have the Post-it stuck in the inside cover of my cookbook from that fateful day when she rattled off the recipe to me. All these years later, the first bite out of the oven is still as perfect.


It’s the best of the breads out there…and it adapts well to gluten-free flour. I bake mine in an old iron skillet or a cast Bundt pan. 


2 sticks + 3 Tbsp butter* 

3 cups flour

2 tsp baking soda

2 tsp baking powder 

½ tsp salt

3 super ripe medium bananas (MUST BE previously frozen and thawed)

4 tsp lemon juice

3 tsp pure vanilla extract

2 cups sugar

2 large eggs

1 cup chocolate chips


1. Place rack in center of oven; heat oven to 350 degrees. 

2. Drop 3 Tbsp butter into skillet, set in oven to melt as oven heats (you want it very hot and bubbly by the time you place mixed ingredients in your skillet).

3. Whisk flour, baking soda, baking powder; salt in separate bowl; set aside.

4. In stand mixer or with handheld blender, beat butter sticks and thawed bananas through with lemon juice and vanilla (it will be lumpy and bumpy, that’s ok, life is sometimes…).

5. Add sugar; beat until as creamy as you can, it will still have lumps (relax, life isn’t perfect…).

6. Add eggs, 1 at a time and beat through; add chocolate chips; mix. 

7. Add dry ingredients, mix lightly.

8. Plop ½ the batter in center of skillet (use a 10-12” adjust cooking time as needed).

9. Pop in oven; bake for 1 hour or until batter is pulled back from edges of pan and fork comes out clean. Let cool on wire rack; flip out of pan onto a pretty plate to serve.


NOTES: This recipe makes 2 batches so get yourself a 2nd skillet or make 1 then the next; or save batter for the next day. Do not split the recipe, it’s just not as good.

I heart “Kerrygold” Irish butter…use the best quality you can find and stock up if it’s on sale, you can use previously frozen butter for this recipe.

In Like a Lion Quiche

Ben Ashby

IN LIKE A LION QUICHE

FROM THE KITCHEN OF KATRINA OHSTROM

INGREDIENTS

1 1/2 cups goat’s milk
4 eggs
2 springs rosemary
1 1/2 cups goats cheddar
1/2 large onion
2 fistfulls arugula
1 bulb garlic
8 spears asparagus
1 tablespoon butter
Salt + pepper
1 pie crust

INSTRUCTIONS

Prep: preheat oven 375, chop rosemary, onion, garlic, grate cheddar. Roll out dough 1/4” thick, sprinkle 1/2 of the rosemary on top, gently roll into surface of dough. Place dough in pie plate, sprinkle 1/4 of the goat’s cheddar into the center, blind bake 5-10 minutes, this will prevent the bottom of the crust from getting soggy.

While crust is blind baking, melt butter in skillet, saute onions and garlic, remove from skillet and saute asparagus and beat together eggs, goat’s milk salt and pepper. Remove crust from oven, add arugula, onions, garlic, pour in egg mixture and top with the remainder of the cheddar and rosemary

Arrange asparagus on top. Bake until crust is golden brown and quiche is set in the middle, approx 40 minutes. Let stand at least an hour before serving. If preparing the night before, cool and refrigerate and then bring to room temp before serving.

PHOTOGRAPHY & RECIPE: KATRINA OHSTROM

— ohstromphoto.com

Easy Banana Pudding

Ben Ashby

This one is an absolute favorite and classic. Super easy to maker and so darn cute in these sweet canning jars. 

Easy Banana Pudding

  • 2 5 ounce packages of instant vanilla pudding mix

  • 4 cups of very cold milk

  • 4 ripe bananas

  • 1 box vanilla waffers

  • 1 quart heavy whipping cream

  • 2 tsp vanilla

  • 1/4 powdered sugar

Mix pudding mix and milk as instructed on box. Set aside. Slice bananas. Beat heavy whipping cream, vanilla, and powdered sugar until whipped cream is desired thickness. 

Starting with waffers, cut or break as necessary to fit into jar, create layers. Alternate between the waffers, the pudding, the sliced bananas, and the whipped cream until jars are full. Finish with a a spot of whipped cream and a banana slice tucked into the top. Garnish with fresh mint if desired. 


Use lids of jars for the perfect beach or picnic treat. Keep cold until serving.  

Old Fashioned Orange Juice Cake

Ben Ashby

Orange Juice Cake

This recipe was a staple for every church potluck, funeral dinner, or just a go-to everyday cake. It’s super moist like pound cake.

1 box yellow cake mix

1 box instant vanilla pudding

4 eggs

½ cup vegetable oil

1 cup orange juice

¼ cup brown sugar 

¼ cup pecans, chopped

GLAZE

½ cup butter

1 cup sugar

¼ cup orange juice

1. Preheat oven to 325 degrees. Mix cake mix, pudding mix, eggs, oil, and orange juice together. 

2. Grease Bundt pan. Spread brown sugar and chopped nuts in the bottom. 

3. Pour batter in pan; bake 35–40 minutes. 

4. For glaze, melt butter in saucepan, add sugar, orange juice; bring to boil, stirring constantly. 

5. After removing cake from oven, pour glaze on cake; cool 15–20 minutes; then invert onto plate.

A Cast Iron Primer

Ben Ashby

The Little Black Dress of the Kitchen

By: Jen O’Connor of Earth Angels Studios

Cast iron is like one of those ancient species, so ideally suited to its environment, that its need to evolve was forgone forever ago. It is one of the most versatile objects in any kitchen and can be used for everything from frying the perfect egg to baking a cake. Cast iron can take the heat on stovetop or oven, transferring from one to the other with aplomb! So, if you have a cast iron skillet, you could use it, and it would keep coming back from more. It just doesn't wear out; indeed many of them in active service have been on duty for more than 100 years. So, if you have a cast iron skillet in your kitchen, and you are not pressing this dedicated workhorse into service, you should be wondering just why not?


Cooking is a learning process—an art form that constantly absorbs the new. So many cooks are forever on the prowl for the new gadget, the more convenient appliance or a utensil that will make some task easier. In the hunt for the new, there are those among us that might just be guilty of setting aside a three or four pound cast iron pot for something more lightweight or easier to store. In the era of super non-stick surfaces and the age of anodized aluminum, cast iron may have been overlooked for commercially promoted brands and sleeker lines of cookware promising efficient and specialized attributes.

But, like all truly beautiful things, cast iron feels no threat. It has no need to waver from its perfection, and that little skillet will wait in quiet confidence for renewed appreciation by the cook who decides to use it. Fortunately for cast iron and its devotees, there's been a recent celebration of its merits among those who pursue slow living. In its versatility and simple charms, it appeals to cooks who treasure its humble beauty. Cast iron is affordable and versatile…it’s practical and durable…and the art of slow living celebrates these qualities. Like the little black dress that hangs in your closet just perfect for any occasion, cast iron stands at the ready to save the day by simply doing what it does best…cook like nothing else in your kitchen! 

Cooks love cast iron for what it does for them with regard to handling temperature. It does not heat evenly, but once it's hot, it stays hot and will cook something evenly by retaining the heat more consistently. As such, cast iron lends itself to baking and was fashioned into inset ovens as well as the tightly lidded pot—or Dutch oven—that we picture baking biscuits over a campfire. Conversely, on the stovetop, cast iron sears meats in a way no other cookware can.

Origins of the Alloy….

Cast iron has been around forever…well, almost forever. There are archaeological finds that date cast iron to 400 AD in China where the alloy was first made and used in the production of agricultural tools, architectural ornaments and pagodas, and some weapons. The knowledge of this metallurgy production, along with cast iron objects and tools, slowly made their way from Asia to other regions along trade routes. By the 1400s, cast iron was well ensconced as an alloy in Western Europe and was used widely in the production of household goods and weapons. Some cooking vessels were used in the early years of cast iron production, but it wasn’t until the 1700s that the cast iron “Dutch Oven” became the ubiquitous cooking pot.

That said, it's safe to say that in the past 300 years many kitchens had a cast iron skillet and a cast iron Dutch oven to manage the meals of the day and perhaps a cast iron oven—set into a chimney—for the baking. When the Europeans brought cast iron to the Americas during the colonization, the pots populated the hearths and homes of the early settlers and took them westward working their way one meal at a time. Cast iron has always been decidedly at home in the US. Over time manufacturers have added a glass enamel lining and coating to cast iron, and also made cast steel, but cast iron is much cheaper and its proletarian appeal warrants celebration!

Using cast iron…


Cast iron deserves a spot in everyone’s cabinets. And while it might get moved to the back of the shelf, its form and function will never go out of style. It’s durable—and it’s practically indestructible—but it asks for a few simple things to assure its functionality. After use, it should be washed with mild soapy water and dried, THOROUGHLY. If you really want it to love you forever, give it a quick swipe with oil on a paper towel and pop the pan back in a hot oven to dry it completely or heat it for just a bit on a burner so the oil will not go rancid. This preserves the seasoning.


You can’t put a cashmere sweater in the washing machine, and you can't put cast iron in the dishwasher. Period. If you do, the seasoning will be gone, and while you can "re-season" it, this can easily be avoided.

Find these US-made vintage lovelies for your kitchen…

Griswold and Wagner are the most sought after of the manufacturers of cast iron cookware. Griswold manufactured in Erie, PA from 1865–1957, and Wagner in Sidney, OH from 1891–1999, but the companies’ success waned in the late 1940s and continued to decline after these family businesses were bought and subsumed into a larger housewares brand. Griswold is usually marked, and it's easy to spot, with “Erie” or the well-known logo featuring a blocky cross in a circle logo on the bottom of pots. Wagner used a variety of logos—and sometimes none at all—so its provenance is more difficult to document. Pre-1890s cast iron may have what is called “gate marks” on the bottom—this slash mark is a remnant of the casting process.

Lodge—a company, based in TN has been making cast iron—and cast stainless steel—since 1896. They're a great option if you prefer new to vintage, and since 2002 they've been selling "pre-seasoned" pans…a game-changer in their appeal and capacity for immediate use. If a cast iron pan is not seasoned, there is time and patience involved with imparting the seasoning to the surface so that the pan can be used and a natural non-stick coating develops with use.

Not-So-Soda Irish Soda Bread

Ben Ashby

Aunt Julie’s Not-So-Soda Irish Soda Bread

By: Jen O’Connor of Earth Angels Studios

I was raised in an Irish-American household, and the only thing I liked about Irish Soda Bread was the butter you got to put on top to make it palatable! This recipe comes from my husband's Aunt Julie Flaherty O'Connor, and it's the best stuff out there. Moist, easy to make…but back to moist… 

I used to call Aunt Julie every St. Patrick’s Day morning to get the recipe, not that I didn’t have it jotted in my mess of a cookbook, but it was an excuse to chat and celebrate the small joy of a recipe shared. And don’t tell anyone, but I make it with ¾ cup of chocolate chips instead of raisins if no one is looking…but here’s Aunt Julie’s, the classic version.

INGREDIENTS

5 cups flour

7½ tsp baking powder 

½–¾ cup sugar (depends on your taste)

1 box raisins 

1 can evaporated milk + water added to make 3 cups liquid

TOPPINGS

1 tsp cinnamon (to taste)

2 Tbsp sugar (to taste)

4 tsp butter

1. In large bowl mix dry ingredients, add raisins; mix them in by hand. Add liquid; mix. 

2. Place in greased cast iron fry pan (size 7 or 8 Griswold). Sprinkle top with cinnamon and sugar.

3. Bake at 325 degrees for 1 hour or until toothpick comes out clean. Brush top with butter while still warm.

Heirloom Oatmeal Cookies

Ben Ashby

A perfect summer treat. Oatmeal cookies are the perfect combination for a snack that won't leave you feeling all overly sweet on a hot summers day.


Oatmeal Cookies

2.5 C Old-Fashioned Oats, Uncooked
1.5 C Self-Rising Flour
1.5 C Brown Sugar, Firmly Packed
1 C Shortening
4 t Cinnamon
1 t Vanilla
0.5 C Milk
2 Eggs

Preheat oven to 400 degrees Fahrenheit. Mix well by hand or with stand mixer. Drop by teaspoonfuls onto a lightly greased cookie sheet. Bake 10 minutes.

Old Fashioned Chocolate Pie

Ben Ashby

Old Fashioned Chocolate Pie

Pie is probably my favorite dessert. Actually it is, it is without question my favorite dessert. Well, bread pudding is right up there with it. This recipe is a traditional chocolate pie, but it incredibly easy. It is perfect for any season. Pie really should be celebrated all year long.

A classic southern chocolate pie recipe just like your grandmother used to make. Perfect for the baptist potluck, a funeral dinner, or as a gift to a new neighbor. Pairs well with sweet tea, fire flies, and heirloom quilts.

1 cup sugar

3 tablespoons unsweetened cocoa 

4 tablespoons cornstarch

2 egg yolks

3/4 cup cream

1/4 cup water

1 teaspoon vanilla

2 tablespoons butter

Pre-Baked pie crust

Combine sugar, cocoa, cornstarch, egg yolks, cream and water in a saucepan, and cook until thick, stirring constantly. Remove from heat and add vanilla and butter. Stir well. Pour into a baked pie crust. Top with meringue.

Strawberry Pie

Ben Ashby

Warmer weather cannot come soon enough! I found myself sitting here dreaming of days when you can step outside barefoot and feel the grass between your toes.

 One of my favorite things to do when the weather turns warmer is go strawberry picking. I absolutely love strawberries and none of the store bought ones ever seem to taste as good as the ones we pick ourselves. On the way back from the farm they always make our car smell so good and all I can think about is eating them dipped in warm, melted chocolate...my favorite!

There are so many things to do with your fresh strawberries, like making jam or ice cream or fresh smoothies...the possibilities are endless. One of my favorites however, is a nice slice of strawberry pie.

This is the easiest pie that I have ever made and by far one of the best.  Maybe it's because I love these fresh strawberries so much or maybe it's because of all that incredible whipped cream that I pile on top of my pieces. The vanilla pudding mix whipped with the cream is the best. There's no way I could go back to eating store bought whipped cream after this! Just wait until you try it.

What do you like to make with strawberries?


Strawberry Pie

3 quarts strawberries, hulled and divided

1 1/2 cups sugar

6 Tablespoons cornstarch

2/3 cup water

10-inch deep-dish pie crust, baked

1 cup whipping cream

1 1/2 Tablespoons instant vanilla pudding mix

Optional: A few drops of red food coloring

In a large bowl, mash berries to equal 3 cups; set aside along with remaining whole berries. Combine sugar and cornstarch in a large saucepan. Stir in mashed berries and water; mix well. Bring to a boil over medium heat, stirring constantly; heat and stir for 2 minutes.

Remove from heat, add food coloring if desired for red color. Pour mixture in a large bowl; chill for 20 minutes, stirring occasionally, until mixture is just slightly warm. Fold in remaining whole berries. Pour into prepared pie crust, chill for 2-3 hours. Place cream in a small mixing bowl, use a hand mixer to whip cream and pudding mix until soft peaks form. Spread whipped cream mixture around edge of pie or dollop on individual slices. Serves 8-10. 

Strawberry Pie photography, styling, and recipe by Rikki Snyder. Find more from Rikki on her website and on Instagram—@RikkiSnyder.

Chocolate-Filled Red Velvet Cupcakes

Ben Ashby

Being that red velvet is one of my all time favorite desserts, these sinfully delicious chocolate-filled red velvet cupcakes topped with cream cheese frosting can always be found somewhere in the kitchen this time of year. Grab one and prepare to indulge!

Chocolate-Filled Red Velvet Cupcakes


1 cup milk chocolate pieces

1/4 cup heavy cream

1/4 cup plus 1 Tablespoon butter

1 egg

1 cup all-purpose flour

2 teaspoons unsweetened cocoa powder

3/4 cup sugar

2 teaspoons red food coloring

1/2 teaspoon vanilla

1/2 cup buttermilk

1/2 teaspoon baking soda

1/2 teaspoon white vinegar


For filling, in small saucepan combine chocolate pieces, cream and 1 Tablespoon butter. Stir over low heat until chocolate is melted. Transfer to small bowl; cool for 15 minutes, stirring occasionally. Cover and freeze about one hour, until fudge-like consistency. Divide into 12 portions and working quickly with hands, roll each portion into a ball. Place in freezer. Preheat oven to 375 degrees F. Line a muffin pan with 12 paper bake cups. In a small bowl stir together flour, cocoa powder and 1/4 teaspoon salt; set aside. In a medium mixing bowl beat the 1/4 cup softened butter with mixer on medium to high for 30 seconds. Gradually add sugar; beat on medium until combined. Beat on medium 2 minutes more, scraping side of bowl occasionally. Beat in egg, food coloring and vanilla. Alternately add flour mixture and buttermilk, beating on low until combined. In a small bowl combine baking soda and vinegar; stir into batter. Divide half of the batter among the cups. Place a ball of filling on batter in center of each cup and spoon remaining batter into cups. Bake 15-18 minutes or until tops spring back when lightly touched. Remove and cool 10 minutes. Serve warm or cool completely and top with cream cheese frosting. Makes 12 cupcakes. 

Cream Cheese Frosting

8 ounces cream cheese, room temperature

8 Tablespoons (1 stick) unsalted butter, cut into pieces and room temperature.

1 cup confectioner’s sugar

1 teaspoon pure vanilla extract

Place cream cheese in a medium mixing bowl. Using a rubber spatula, soften cream cheese. Gradually add butter and continue beating until smooth and well blended. Sift in confectioner’s sugar and continue beating until smooth. Add vanilla and stir to combine. Yields about 2 cups. 

Strawberry Rhubarb Pie Ice Cream Sandwiches

Ben Ashby

Strawberry Rhubarb Pie Ice Cream Sandwiches

FOR THE STRAWBERRY HAND PIE CRUST
3 cups flour
4 Tbsp granulated sugar
1 tsp cinnamon
½ tsp salt
½ tsp nutmeg
8 oz unsalted butter, cold
6–10 Tbsp ice water

1 egg

1 Tbsp milk

FOR THE STRAWBERRY HAND PIE FILLING
¾ lb strawberries, caps removed, cut into 1” slices
1 stalk rhubarb, chopped
3 Tbsp granulated sugar

FOR THE ICE CREAM
1½ cups strawberry ice cream

To Make the Crust 

1. Mix dry ingredients in large bowl. Grate butter over bowl on largest hole setting. Stop every 2 minutes to stir in grated butter bits (avoid 1 giant butter shard clump). 

2. Add water in small increments, stirring until all water is added. Knead dough 30 seconds to disperse moisture. 

NOTE: Grab handful of mixture; squeeze. If it sticks together when released, it’s fine. If it completely crumbles apart add 1–2 Tbsp water. Once dough holds its shape divide into 2 balls.

3. Preheat oven to 375 degrees. Lay sheet of parchment on flat working surface; lightly dust with flour. 

4. Place 1 dough ball on parchment, pat it to a rough oval shape a few inches thick. Lightly flour the top, lay another sheet of parchment on top, roll out dough to about ⅛” thick between sheets of parchment. Repeat with other ball (2 sheets of dough between parchment).

5. Line large baking sheet with parchment paper. Use 3” round cookie cutter to cut out bottoms of hand pies, place them on baking sheet with 2” inches space between. 

6. Use slotted spoon to put some sliced strawberry filling on top, leaving ¼” border around to seal crust.

7. Use 3½” round cookie cutter to cut tops of hand pies out of other sheet of dough. To seal, dip finger in water, trace around edge of bottom crust. Place larger dough circle on top, press edges to seal. 

8. Use fork to crimp edges, use knife to cut a few small holes in top to allow steam to escape. Repeat until you've made 12 hand pies.
9. Whisk together egg and milk; lightly brush on pies. Place them in oven, bake until golden brown about 40 minutes. Cool before assembling.

To Make the Filling 

1. Toss strawberries, rhubarb, sugar in medium bowl until combined. Empty mixture into small saucepan; bring to boil over medium-high heat. 

2. Reduce heat to low, simmer until strawberries have softened, some liquid has evaporated; 15–20 minutes. 

3. Remove from heat, set aside, cool to room temp.


To Prep the Ice Cream Centers 

1. Line ¼ cup measuring scoop with plastic wrap. Use spoon to scoop ice cream into measuring cup; compact it. 

2. Turn it onto tray lined with parchment paper, remove plastic wrap from top. Line cup with plastic wrap again; repeat until you have 6 mounds of ice cream. Place tray in freezer 1 hour.

To Assemble the Pies
When ready to serve, assemble by placing each ice cream disc in between 2 pies.

Cinnamon Hot Chocolate

Ben Ashby

Before we go any further there is one thing that I must confess, I have a huge sweet tooth. And I mean huge. However, if there was one flavor that I could ever love more than chocolate it would be cinnamon. And so, you can imagine my excitement when the two are combined. This hot cocoa is nothing short of delightful and is a great drink to sip on a cold winter evening. It will warm your bones, and liven your taste buds. 

Cinnamon Hot Chocolate

3 ounces semisweet chocolate

1 Tablespoon sugar

1 teaspoon ground cinnamon

2 cups milk

1/2 teaspoon vanilla

A few drops of almond extract

Whipped cream, chocolate shavings and cinnamon sticks for garnish.

Cut chocolate into pieces and place in blender or food processor. Add sugar and cinnamon. Cover and blend or process until finely ground. Cook and stir chocolate mixture and milk in a large saucepan over low heat about 10 minutes or until chocolate melts. Remove saucepan from heat; stir in vanilla and almond extract. Beat with a rotary beater until very frothy. Serve in mugs. Top with whipped cream, chocolate shavings and cinnamon sticks if desired. Makes about 4 (8-ounce) servings.

3 Easy Fall Recipes All Apple Lovers Will Adore

Ben Ashby

Apple Cake, Apple Pie, and Apple Cider -Oh My!

a.k.a. Fall Heaven

One of my favorite memories as a child is when we would take our annual trip to the orchard to pick out some pumpkins to carve, take a relaxing hayride, and eat apples literally any way possible. Apple cider, apple fritters, apple cake, apple muffins, apple butter, apple bread, apple pie, apple cider ice cream, apple crisps, caramel apples, candied apples, I think you get the idea. I wanted to share a few of my favorite apple recipes for you to make this fall that I am sure you’ll love. Also, though optional, I strongly encourage you to go find a local orchard to both support a local business but also make the memories like I had as a kid -you won’t regret it.

Apple Cider Cake

boxed spice cake mix, apple cider, melted butter, eggs

1. Start with a standard boxed spice cake mix. Follow the directions on the box, but substitute the water the box will call for with apple cider. Substitute the oil for melted butter. Use the amounts called for on the box.

2. I personally prefer to bake this cake in a Bundt pan. Sprinkle chopped walnuts or pecans in the bottom of the pan. Grease well before adding the batter.

3. Allow cake to cool before inverting on serving stand or plate.

4. Top cake with fresh whipped cream and chopped pecans.

5. Add pumpkin spice to your whipped cream for additional seasonal flair.

Iron Skillet Apple Pie

1 Tbsp molasses

1 Tbsp lemon juice

1 stick butter

1 cup brown sugar

2 pastry shells

8 peeled and sliced apples

2 tsp cinnamon

1 tsp nutmeg

½ tsp ginger

½ cup white sugar

1. In a large mixing bowl combine apples, spices, sugar, molasses, lemon juice, and ½ cup of brown sugar. Set aside to allow flavors to combine. The acid in the lemon juice will prevent the apples from browning.

2. Preheat oven to 350 degrees. Place ¾ stick of butter and remaining brown sugar in the skillet. Place in oven and heat until butter is melted.

3. Remove from oven and place one pie crust in the pan, atop the sugar and butter. Fill with apple mixture. Slice remaining butter and place on top.

4. Cover with second crust and slice vents into crust. Top with a dusting of cinnamon. Place in oven for one hour, or until apples appear tender when pricked.

NOTE: If crust is browning too quickly cover with aluminum foil.

Slow Cooker Apple Butter

12 apples sliced, 1 Tbsp cinnamon, ½ cup sugar (optional)

1. Place sliced apples, cinnamon, and sugar in a slow cooker and cook on high for 6 hours. Once apples are tender allow to cool.

2. Place in blender and blend until desired thickness.

3. Allow to cool; store in fridge for up to 2 weeks.


Summertime Tea | A Recipe

Ben Ashby

Summertime Tea

Fresh berries for muddling (such as strawberries or blueberries)


Three parts fruit tea
One part gin
Thyme or rosemary for garnish

In a cocktail shaker, muddle your choice of fresh fruit. Pour in the fruit tea and gin then add ice and shake. Serve on or off the rocks and garnish with your choice of fresh herbs.


Goat Cheese, Watermelon, & Herbs

Ben Ashby

This snack really is overly simple. So simple that I struggled with the idea of even writing the recipe, but it needed to be written. This recipe is a perfect summer or fall treat. The sweetness of the melon paired with the sharp tang of the goat's milk cheese is a real delight. We kept it simple with our recipe, but a splash of sea salt and balsamic really adds even more flavor to the dish.


  • Watermelon, cubed into bite size wedges

  • Block of goat's milk cheese

  • Herbs for garnish, we used min, basil, and rosemary

  • Ground black pepper

We allowed everyone to assemble their own, but you can easily prepare this ahead of time and create delightful little stacks.


Old Fashioned Chocolate Pie

Ben Ashby

This pie is perfect for any season, but it is especially perfect for spring...during the time you want pie, but before fresh fruit comes into season. This old fashioned chocolate pie is super simple to make and will always be a hit.

We find it especially delightful to serve at a family function, a revival meetin' or an after funeral fellowship supper. Its the perfect combination of sweet chocolate goodness and festive wholesome bless your heart hospitality. 


Old Fashioned Chocolate Pie


Danish Pie Crust (yields two crusts)

  • 2 1/2 C Self-Rising Flour

  • 1 C Crisco

  • 1 T Sugar

  • 1/2 C Milk

  • 1 Egg

Preheat oven to 375 degrees Fahrenheit. Mix well. Roll flat, and work into pie pan. Prick bottom, then bake until golden brown. Reduce oven to 350 degrees.


Chocolate Filling

  • 1 C Sugar

  • 3 T Baking Cocoa

  • 4 T Cornstarch

  • 2 T Margarine

  • 2 Egg Yolks

  • 3/4 C Milk

  • 1/4 C Water

  • 1 t Vanilla


Combine sugar, cocoa, cornstarch, egg yolks, cream, and water in a medium saucepan. Stirring constantly, cook over medium to medium high heat. Remove from heat when thickened and stir in margarine and vanilla. Pour into baked pie crust and top with meringue. Bake at 350 for 7-8 minutes, until lightly browned.


Photographed with a Canon 5D IV

Candied Violets

Ben Ashby

Candied violets are perfect for spring. They are perfect for cake toppers, fruit salads, or beautiful garnish when creating a platescape. They also couldn't be more simple to create and to master.

Simply take clean, organic, violet blooms. Place on a flat surface. Make sure they are dry. In a bowl mix together one egg white and two tablespoons of fine white sugar. With a small brush. I use a paint brush. Paint the egg white and sugar mixture very carefully on each bloom. Allow to air dry for several hours. Then you're ready to decorate cakes, plates, and more with these beautiful sweet petite moments.