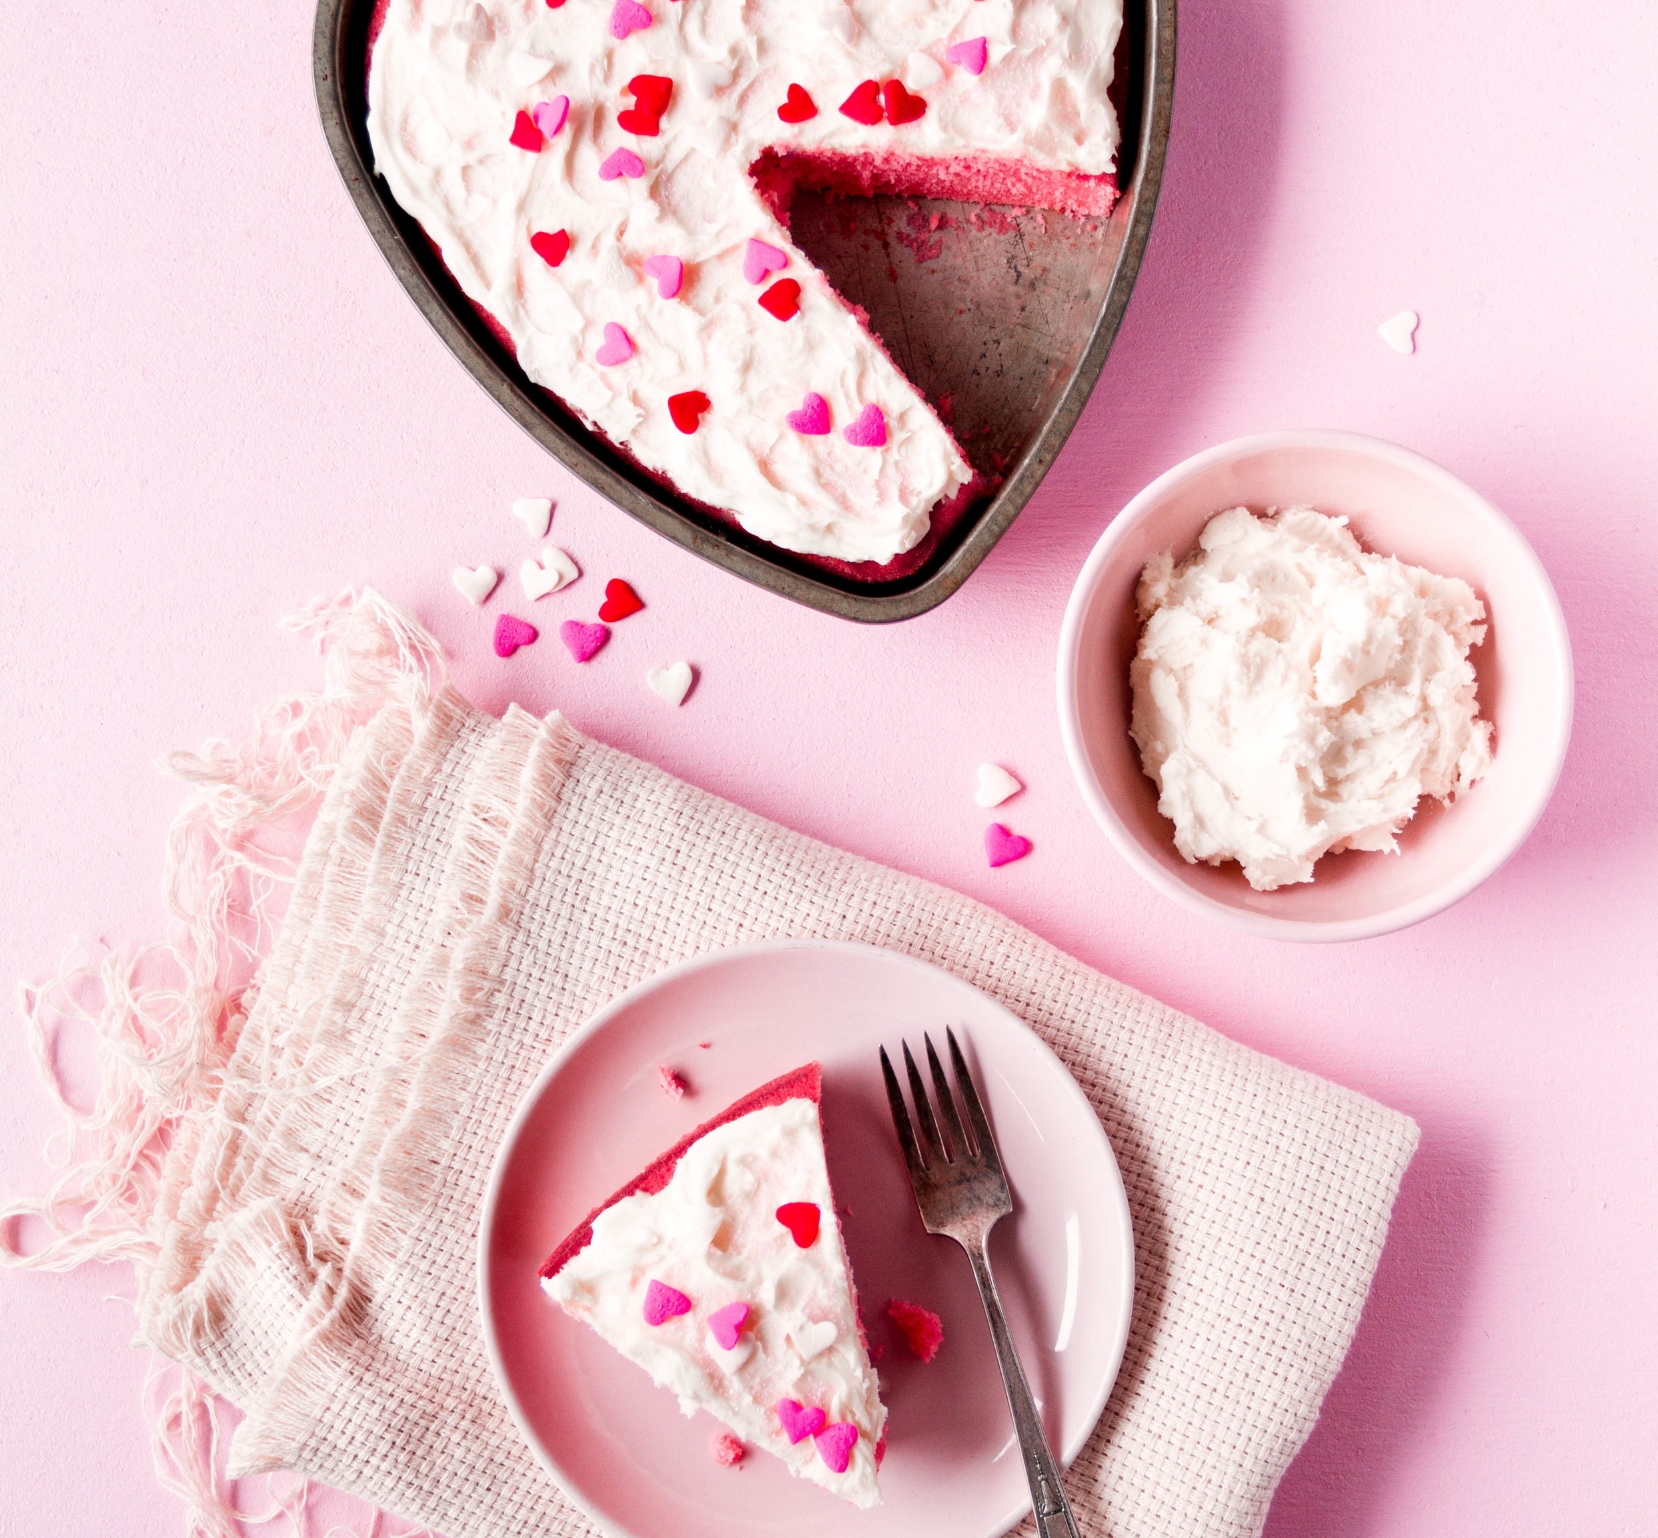
Contact Us

Use the form on the right to contact us.

You can edit the text in this area, and change where the contact form on the right submits to, by entering edit mode using the modes on the bottom right. 


123 Street Avenue, City Town, 99999

(123) 555-6789

email@address.com


You can set your address, phone number, email and site description in the settings tab.
Link to read me page with more information.

CONTENT

Filtering by Tag: foodvault

Strawberry Pie

Ben Ashby

Warmer weather cannot come soon enough! I found myself sitting here dreaming of days when you can step outside barefoot and feel the grass between your toes.

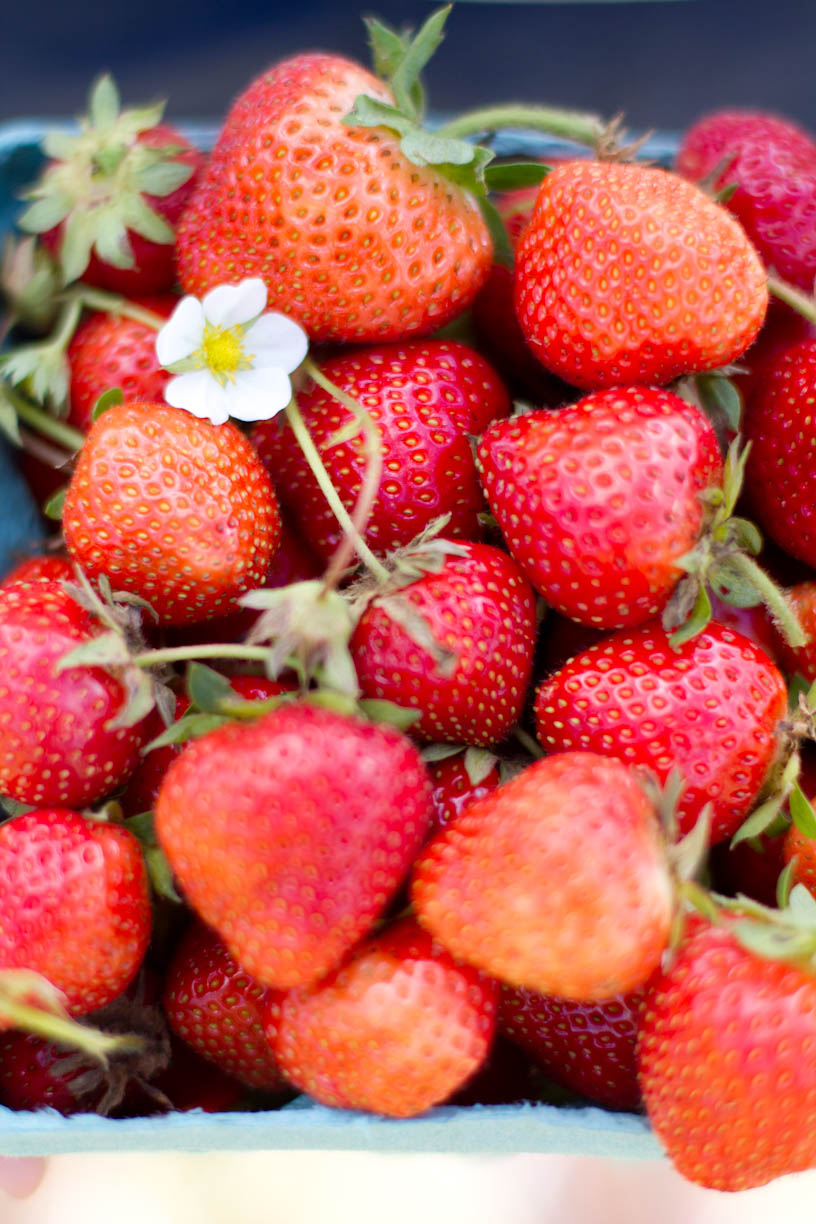
 One of my favorite things to do when the weather turns warmer is go strawberry picking. I absolutely love strawberries and none of the store bought ones ever seem to taste as good as the ones we pick ourselves. On the way back from the farm they always make our car smell so good and all I can think about is eating them dipped in warm, melted chocolate...my favorite!

There are so many things to do with your fresh strawberries, like making jam or ice cream or fresh smoothies...the possibilities are endless. One of my favorites however, is a nice slice of strawberry pie.

This is the easiest pie that I have ever made and by far one of the best.  Maybe it's because I love these fresh strawberries so much or maybe it's because of all that incredible whipped cream that I pile on top of my pieces. The vanilla pudding mix whipped with the cream is the best. There's no way I could go back to eating store bought whipped cream after this! Just wait until you try it.

What do you like to make with strawberries?


Strawberry Pie

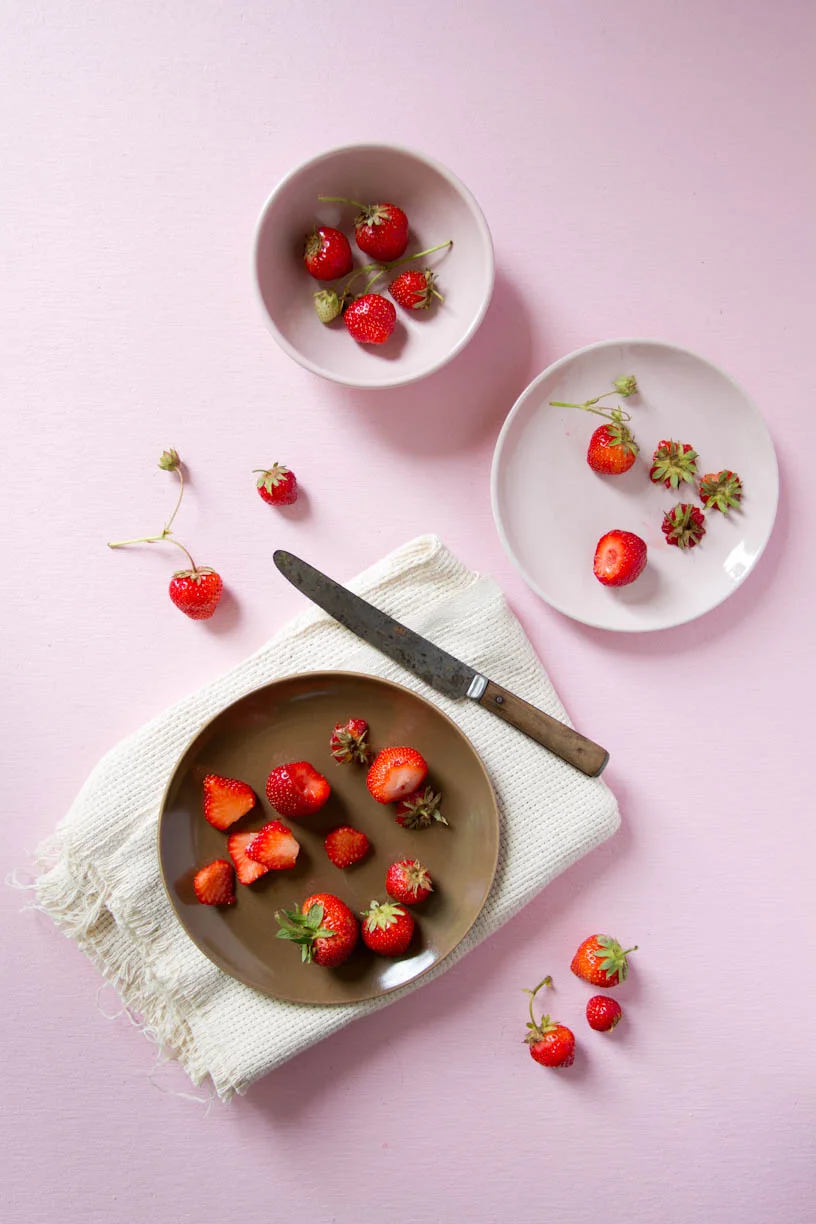
3 quarts strawberries, hulled and divided

1 1/2 cups sugar

6 Tablespoons cornstarch

2/3 cup water

10-inch deep-dish pie crust, baked

1 cup whipping cream

1 1/2 Tablespoons instant vanilla pudding mix

Optional: A few drops of red food coloring

In a large bowl, mash berries to equal 3 cups; set aside along with remaining whole berries. Combine sugar and cornstarch in a large saucepan. Stir in mashed berries and water; mix well. Bring to a boil over medium heat, stirring constantly; heat and stir for 2 minutes.

Remove from heat, add food coloring if desired for red color. Pour mixture in a large bowl; chill for 20 minutes, stirring occasionally, until mixture is just slightly warm. Fold in remaining whole berries. Pour into prepared pie crust, chill for 2-3 hours. Place cream in a small mixing bowl, use a hand mixer to whip cream and pudding mix until soft peaks form. Spread whipped cream mixture around edge of pie or dollop on individual slices. Serves 8-10. 

Strawberry Pie photography, styling, and recipe by Rikki Snyder. Find more from Rikki on her website and on Instagram—@RikkiSnyder.

Shamrock Peppermint Creams

Ben Ashby

Shamrock Peppermint Creams

BY: RIKKI SNYDER

To be perfectly honest, I’m probably only about 3% Irish, but as a little kid I always got strangely excited for St. Patrick’s Day. In grade school we would go outside for recess and come back in to find the items in our desks were all messed up and rearranged and the teachers told us it was from the pesky leprechauns. To this day, I still don’t know why, but I thought that was the coolest thing ever.  

Many years later and I still find myself getting excited for March 17th to roll around. Seeing all the green of this holiday makes me feel like spring is right within my reach! It’ll be here before we know it and for that I’m celebrating with these bright green shamrock peppermint creams!

If you’re wondering what a peppermint cream is think of it as a slightly larger after dinner mint. That’s what it reminds me of. If you can’t find a miniature shamrock cookie cutter a bigger one will work just as well. And if you’re a chocolate lover like me, dip your mints in some melted chocolate and sprinkle with some St. Patty’s sprinkles!

Shamrock Peppermint Creams

1 3/4 cup confectioners’ sugar

4-6 Tablespoons sweetened condensed milk

1/2 teaspoon peppermint extract

Green food coloring paste

A mini shamrock-shaped cutter

Sift the confectioners’ sugar into a large bowl. Gradually add the condensed milk and peppermint, mixing with a wooden spoon. The mixture should come together like a dough and you may need to use your hands towards the end of mixing. To knead the dough, sprinkle confectioners’ sugar on a clean work surface. Shape the dough into a ball and push on it and press it onto the work surface, turning it round often. Do this for just a minute of so until smooth. Divide the dough in half and tint one half green using food coloring. Knead the dough again until it is evenly green. On the work surface, roll out the dough to a thickness of 1/4 inch using a rolling pin. Stamp out shamrocks with your cookie cutter and arrange them on a sheet of baking parchment. Let dry out overnight. Dip in melted chocolate and cover with sprinkles if desired. 

Savory Herb Biscuits

Ben Ashby

And what would go better with this soup than a warm biscuit smothered in butter and dried basil? They're quick and easy too. Pop them right in the oven just before the soup is done and you have the perfect bread for dipping.


Savory Herb Biscuits

BY: RIKKI SNYDER


2 cups biscuit mix

1/2 cup Cheddar cheese, shredded

2/3 cup milk

1/4 cup butter or margarine, melted

1/2 teaspoon garlic powder

1/2 teaspoon basil, dried


Preheat oven to 450 degrees. Combine biscuit mix, cheese and milk until a soft dough forms. Beat vigorously for 30 seconds. Drop by heaping tablespoonfuls onto and ungreased cookie sheet. Bake for 10-12 minutes, or until golden brown. Combine basil and garlic powder with melted butter and brush over biscuits after removing from oven. Makes 12 biscuits


Potato Soup

Ben Ashby

This rustic and hearty soup makes for a perfect savory meal this season. The yukon gold potatoes offer a unique flavor that is perfectly complimented by the crumbled bacon. Save some extra bacon for garnish and if you're a cheese lover, sprinkle some shredded cheddar on top before serving and it'll melt right in.


Potato Soup

BY: RIKKI SNYDER


8 slices bacon, fried and crumbled

1 cup onion, chopped

1 cups yukon gold potatoes, chopped

1 cup water

10 3/4 oz. Can cream of chicken soup

1 cup sour cream

1 3/4 cup milk

1 Tablespoon parsley, chopped

1/2 teaspoon salt

Dash of pepper


Fry bacon and crumble. Set aside, reserving some drippings in skillet. Saute onion in same skillet until transparent. Add potatoes to and boil until tender, about 15 minutes. Add soup, sour cream, milk, bacon and onions, parsley, salt and pepper. Mix well and let simmer 2 hours. 


FOLK Valentine's Day

Ben Ashby

Valentine’s day...it seems to be that one little holiday that everyone either loves or well...doesn’t. While I do enjoy Valentine’s day, I’ll admit it can be a bit silly and sometimes it causes people to go over board buying boxes of expensive chocolates, big bouquets of red roses, giant teddy bears and maybe even diamonds, all to show someone you love them. Me? Well, that’s not my thing. Do we really need all those costly, fancy things to tell someone how much they mean to us? And while we’re on the subject, why can’t we make that same effort everyday to show the love we have for each other- minus all the stuff of course? Someone once told me they were committed to living Valentine’s day year-round. Not only because they like the colors pink and red so much (go figure), but because they want to feel that same amount of love everyday and always tell their friends and family how important they are to them. Imagine how wonderful it would be to live in a world like that, where everyone can put our differences aside and constantly show each other love and kindness. 

This brings me to the second (and totally less serious) reason why I enjoy Valentine’s day so much, the sweets! I could never bake enough red velvet and chocolate-y desserts. My sweet tooth really kicks in this time of year but in all honesty, to me, food is love. Maybe a lot of that has to do with being Italian and Greek and it’s instilled in us at an early age, but also there is something so fulfilling to me about spending time in the kitchen baking for my loved ones and being able to give them something I made with my own hands. From my kitchen to yours, I am sharing my 4 favorite Valentine’s day recipes that bring pure joy to my heart to be able to share with my dear family and friends on February 14th. What do you bake for the ones you love?

Recipes:

For little kids and pink lovers alike, this pink velvet cake with white chocolate ganache is the perfect Valentine’s day treat. Let’s be honest, does it get anymore fun than pink cake? If you’re making your cake in a heart shaped pan you may have leftover batter depending on the size, so feel free to use it to make a few cupcakes as well.

Pink Velvet Cake

1 cup butter, softened

1 1/4 cups sugar

1/8 teaspoon pink paste food coloring

3 eggs

1 teaspoon vanilla extract

2 1/2 cups all-purpose flour

1 1/2 teaspoons baking powder

1/4 teaspoon baking soda

1/4 teaspoon salt

1 cup buttermilk

White Chocolate Ganache

2 cups white baking chips

1/2 cup heavy cream

1 Tablespoon butter

In a large bowl, cream the butter, sugar and food coloring until light and fluffy. Add eggs, one at a time, beating well after each addition. Beat in vanilla. Combine the flour, baking powder, baking soda and salt in a medium sized bowl; add to creamed mixture alternately with buttermilk, beating well after each addition.

Fill greased, medium sized heart shaped pan or paper-lined muffin cups two-thirds full. For cake, bake at 350 degrees F for 30-35 minutes (this is for a medium sized heart shaped cake pan, adjust baking time based on size, bake until a toothpick inserted near the center comes out clean). For cupcakes, bake at 350 degrees F for 23-27 minutes or until a toothpick inserted near the center comes out clean. Cool for 10 minutes before removing from pans to wire racks to cool completely.

Meanwhile, place the white chips in a small bowl. In a small saucepan, bring cream just to a boil. Pour over chips; whisk until smooth. Stir in butter. Transfer to a large bowl. Chill for 30 minutes, stirring once.

Beat on high speed for 2-3 minutes or until soft peaks form and frosting is light and fluffy. Frost cake/cupcakes. Store in refrigerator.

Being that red velvet is one of my all time favorite desserts, these sinfully delicious chocolate-filled red velvet cupcakes topped with cream cheese frosting can always be found somewhere in the kitchen this time of year. Grab one and prepare to indulge!

Chocolate-Filled Red Velvet Cupcakes

1 cup milk chocolate pieces

1/4 cup heavy cream

1/4 cup plus 1 Tablespoon butter

1 egg

1 cup all-purpose flour

2 teaspoons unsweetened cocoa powder

3/4 cup sugar

2 teaspoons red food coloring

1/2 teaspoon vanilla

1/2 cup buttermilk

1/2 teaspoon baking soda

1/2 teaspoon white vinegar

For filling, in small saucepan combine chocolate pieces, cream and 1 Tablespoon butter. Stir over low heat until chocolate is melted. Transfer to small bowl; cool for 15 minutes, stirring occasionally. Cover and freeze about one hour, until fudge-like consistency. Divide into 12 portions and working quickly with hands, roll each portion into a ball. Place in freezer. Preheat oven to 375 degrees F. Line a muffin pan with 12 paper bake cups. In a small bowl stir together flour, cocoa powder and 1/4 teaspoon salt; set aside. In a medium mixing bowl beat the 1/4 cup softened butter with mixer on medium to high for 30 seconds. Gradually add sugar; beat on medium until combined. Beat on medium 2 minutes more, scraping side of bowl occasionally. Beat in egg, food coloring and vanilla. Alternately add flour mixture and buttermilk, beating on low until combined. In a small bowl combine baking soda and vinegar; stir into batter. Divide half of the batter among the cups. Place a ball of filling on batter in center of each cup and spoon remaining batter into cups. Bake 15-18 minutes or until tops spring back when lightly touched. Remove and cool 10 minutes. Serve warm or cool completely and top with cream cheese frosting. Makes 12 cupcakes.

Cream Cheese Frosting

8 ounces cream cheese, room temperature

8 Tablespoons (1 stick) unsalted butter, cut into pieces and room temperature.

1 cup confectioner’s sugar

1 teaspoon pure vanilla extract

Place cream cheese in a medium mixing bowl. Using a rubber spatula, soften cream cheese. Gradually add butter and continue beating until smooth and well blended. Sift in confectioner’s sugar and continue beating until smooth. Add vanilla and stir to combine. Yields about 2 cups.

I’ve been so blessed to grow up with such a wonderful, talented and supportive family. My father went to the Culinary Institute of America and over the years I’ve enjoyed learning as much as I can from his knowledge of food to help me in my own career. This recipe for chocolate mousse was one he learned from a charcuterie chef when he was in school (strange, right?!). He then taught me how to make this incredibly decadent and in my opinion, best chocolate mousse ever. I’ve watched my father make this recipe by hand numerous times. Imagine the arm strength required to whip that cream and those egg whites by hand...amazing. I had to cheat and use a mixer but still, this one is for you Dad, I love you!  

Chocolate Mousse

9 ounces unsweetened chocolate

9 ounces sugar

9 egg yolks

9 egg whites

1/2 cup water

1 quart heavy cream

Melt chocolate in a double boiler and keep hot in the corner of the stove. Separate eggs and yolks and put each in its own bowl. Whip the heavy cream until it’s stiff (peaks and stays) and chill in a stainless steel bowl. Mix the water and sugar in a small sauce pan and cook to the thread. Start whipping the egg whites until stiff. While they’re whipping, when the sugar mixture is complete pour it over the egg yolks and whip immediately until it starts to foam bubbles. Pour the hot, melted chocolate over the yolk and sugar mixture and with a spatula, gently fold them together until well mixed. Do not whip. With a spatula, fold the stiff egg whites into this mixture. Do not whip. Gently fold in the whipped cream with a spatula, until the color is uniform. Again, be careful not to whip. Put in cups and refrigerate before serving.

Top your chocolate mousse with some beautiful, frosted fruit for a pretty, wintery garnish that you can eat!

Frosted Fruit

2 teaspoons dried egg whites

1-2 packages of your desired fruit (I used raspberries and strawberries)

2 Tablespoons warm water

Superfine sugar

In a medium sized bowl, whisk the dried egg whites and warm water with a balloon whisk until foamy. Line a cookie sheet with parchment paper and place the washed and dried fruit on it. Using a pastry brush, brush the egg whites over the fruit, covering them evenly and completely. Sprinkle the superfine sugar over the berries and cover completely. Let the fruit dry for at least a couple hours until the sugar has hardened and becomes crisp.

Breakfast in bed. Ok, it’s kind of a cliche Valentine’s day tradition, but come on, who doesn’t love breakfast in bed! This simple pancake recipe is the perfect ‘breakfast in bed food’. Mixing cinnamon and chocolate chips into your batter spices them up and adds a touch of romance while making it easier then ever to surprise your loved ones with something homemade on Valentine’s day.

Cinnamon Chocolate Chip Pancakes

2 cups pancake mix

1 teaspoon ground cinnamon

2 eggs, beaten

1 cup milk

2 tablespoons vegetable oil

1 teaspoon pure vanilla extract

1/2 cup chocolate chips

Stir pancake mix and cinnamon in large bowl until well blended. Stir in eggs, milk, oil and vanilla just until blended. Add in chocolate chips. Pour 1/4 cup of batter per pancake onto preheated lightly greased griddle or skillet. Cook 1 to 2 minutes per side or until golden brown, turning when pancakes begin to bubble. Serve pancakes with syrup or fresh fruit if desired.

Iced Tea & Cookies

Ben Ashby

BY RIKKI SNYDER

Have you ever had ginger and orange together? It is a magnificent combination that I don't think I use often enough at all. When I found this recipe I knew it was going to be good as soon as I saw the fresh ginger and "garnish with orange slices".  And sure enough, I was right. 

I’m turning into a tea lover and nothing can beat this refreshing ginger sun tea. The ginger adds just a light hint of flavor which makes this tea ten times more refreshing. And when you put those orange slices in... oh is it delicious! I put a lot in my tea and let it sit there for a little to really let the flavors combine until the citrus perfectly compliments the ginger.

I think a lot of tea drinkers can agree that a nice glass of iced tea wouldn't be the same without cookies to go along with it. My cookie of choice to accompany my tea drinking are these chocolate chip bars. They're so simple and it's the perfect snack that reminds me of picnic baskets, plaid blankets and sitting outside in the green grass with blue skies above. 

What is your favorite tea & sweets combination?

Ginger Sun Tea

4 1/2 cups cold water

8 teabags

1-2 inch slice of fresh ginger, peeled and thinly sliced

2-4 Tablespoons of sugar

2 12-oz bottles ginger ale, chilled

Garnish: orange slices

Combine water, teabags and ginger in a 2-quart glass container; cover with a lid or plastic wrap. Let stand in full sun or at room temperature for 2-3 hours. Remove teabags; stir in sugar. Cover and chill. At serving time, strain into a 2-quart pitcher. Stir in ginger ale, pour over ice and garnish with orange slices. Makes 8 servings.


Chocolate Chip Bars

2 1/4 cups flour

1 teaspoon baking soda

1 teaspoon salt

1 cup butter, softened

3/4 cup granulated sugar

3/4 cup packed brown sugar

1 teaspoon vanilla extract

2 eggs

2 cups chocolate chips

Preheat oven to 375 degrees F. Combine flour, baking soda and salt in a small bowl. Beat butter, granulated sugar, brown sugar and vanilla in a large mixing bowl. Add eggs one at a time, beating well after each; gradually beat in flour mixture. Stir in chocolate chips. Spread into a greased 15x10-inch jelly-roll pan. Bake in oven for 20-25 minutes or until golden brown. Cool in pan on wire rack. 

Basil Lemonade

Ben Ashby

When you need a sweet, little, afternoon pick me up grabbing a cold glass of lemonade can really hit the spot. Now you might think that basil and lemons sounds a little weird together because I did too, at first. But I assure you, it is a most magnificent combination when it comes to lemonade.

If you only want a small hint of the basil use something close to 13 leaves, but if you love it like I do, use 20 or even more leaves. Lemonade is one of my favorite drinks to prepare, especially in the summertime. Squeezing the fresh juice out of the lemons makes your house smell incredible, especially combined with the basil.

I always have to sneak a taste when making the syrup because it’s so good! Add lemon slices to your pitcher or glasses and garnish with extra basil and lemon zest. You could even try substituting the basil for mint for a different flavor!

Basil Lemonade

1 1/4 cup water

3/4 cup sugar

1 cup freshly squeezed lemon juice (about 5 large lemons)

1 Tablespoon lemon zest

6 cups cold water

15-20 basil leaves

1 extra lemon for garnishing


Bring the 1 1/4 cup of water to a boil in a small pot and remove from heat. Add the sugar and stir until well dissolved. Crumble and roll the basil leaves in your hands to release their oils. Add them to the water/sugar mixture along with the lemon zest.

Let it sit until cool. Pour the cold water and lemon juice in a pitcher. Strain the contents of the pot, discard the basil and lemon zest and add the liquid to the pitcher. Stir well, pour over ice and garnish with lemon zest and basil leaves.

Basil Lemonade photography, styling, and recipe by Rikki Snyder. Find more from Rikki on her website and on Instagram—@RikkiSnyder.

Everyday Special Brownies

Ben Ashby

Cake-y or fudge-y? When it comes to brownies, that is the ultimate question. I’m always on the lookout for a solid brownie recipe that I can go to anytime I need a quick snack. After much searching I’ve discovered these everyday special brownies and just like their name they really are something special.

They’re somehow a delicious combination of fudge-y and cake-y all in one. There are only 5 ingredients needed to make these brownies and the batter is whipped up in minutes. That simple. And with how crazy life can get these days I’m always looking for ways to make each day simply special.

Everyday Special Brownies

1 cup butter

1 1/2 cups dark chocolate pieces

3 eggs

1 1/4 cups sugar

1 cup flour

Preheat oven to 350 degrees F. Melt butter and chocolate in double boiler over low heat. Cool to room temperature. Beat eggs in medium bowl until foamy. Stir in sugar and beat at medium speed for 2-3 minutes.

Reduce speed and slowly pour in chocolate-butter mixture. Slowly beat in flour in several additions. Pour into sprayed, floured 9x13-inch baking pan. Bake for 35-40 minutes or until brownies are done in middle. Cool and cut into squares. Makes 12-18 brownies.

Everday Special Brownies photography, styling, and recipe by Rikki Snyder. Find more from Rikki on her website and on Instagram—@RikkiSnyder.

Asparagus Ribbon Salad

Ben Ashby

BY RIKKI SNYDER

With spring coming up quickly this salad is a breath of fresh air! The vibrant veggies,fresh herbs and pops of color that the radishes add are perfect. There are so many different ways you can prepare asparagus and peeling them into ribbons for a nice, healthy salad is one of my favorites!

If you can find purple and white asparagus at your grocery store mix in some ribbons of those colors for even more vibrance. For the best ribbon-making-asparagus, try to pick the thickest pieces you can find. They’re so easy to make, all you have to do is remove the scales of the asparagus, and using a sharp vegetable peeler, peel the asparagus from the tip to the end. After you peel it you can break off the remaining tips and throw them in your salad if you’d like.

The dressing is by far my favorite part of the salad. It’s creamy and so full of flavor from the garlic, fresh parsley and chives. Absolutely divine! What are your favorite spring veggies?

Asparagus Ribbon Salad

1 lb. thick asparagus spears (about 14 pieces)

2 cloves garlic, peeled

1/2 teaspoon coarse kosher salt

1/2 cup sour cream

1/3 cup olive oil

3-4 Tablespoons lemon juice

1/2 cup chopped fresh Italian parsley

1/4 cup chopped fresh chives

1 Tablespoon milk (optional)

1 head Bibb lettuce, torn

1/2 cup seedless cucumber, thinly sliced

3 radishes, very thinly sliced

Remove scales from asparagus spears. Using a vegetable peeler, peel thin ribbons from spears. Place ribbons in medium bowl of ice water. 

For dressing, first make a garlic paste. Finely chop the garlic, then sprinkle with coarse salt. Smash and rub the salt into the garlic using a mortar and pestle or a flat chef’s knife at a slight angle. In a small bowl, whisk together the garlic paste, sour cream, olive oil and lemon juice. Stir in parsley and chives. If desired, thin with milk. Season to taste with black pepper.

Drain asparagus ribbons and pat dry. On a platter arrange lettuce, asparagus ribbons, cucumber slices and radish slices. Drizzle with dressing. Cover and refrigerate any remaining dressing up to 3 days. Makes 6 servings.

Asparagus Ribbon Salad photography, styling, and recipe by Rikki Snyder. Find more from Rikki on her website and on Instagram—@RikkiSnyder.

Almond Lavender Cake

Heath Stiltner

Have you ever cooked with lavender? It’s a very unique scent and flavor. It can be used in many things like lemonade and ice cream... I’ve even seen lavender cupcakes! I like trying new things and before this cake I had never actually tasted something with lavender in it. 

It’s almost hard to describe because there’s nothing else like it. The lavender adds a slightly floral taste that you feel when you breathe in after biting into this cake. Same with the glaze, it adds the softest, sweetest floral taste that’s unexpected but very delicious. 

This cake is absolutely beautiful and makes for a perfect springtime dessert. Garnish the slices with some dried lavender for an extra splash of purple! You can use your own lavender if you grow it in your garden or look for dried lavender in spice shops. 

Almond Lavender Cake

1/4 cup half-and-half cream

2-1/2 cups all-purpose flour

1/2 teaspoon baking soda

1/2 teaspoon salt

4 teaspoons boiling water

3/4 cup confectioners' sugar

Additional dried lavender flowers, optional

2 cups sugar, divided

1/2 cup slivered almonds

1 tablespoon plus 1 teaspoon dried lavender flowers, divided

1 cup butter, softened

4 eggs

2 teaspoons vanilla extract

1 cup (8 ounces) sour cream

Grease a 10-in. fluted tube pan and sprinkle with sugar; set aside. Place 1/2 cup sugar, almonds and 1 tablespoon lavender in a food processor; cover and process until finely ground.

In a large bowl, cream butter and remaining sugar until light and fluffy; beat in almond mixture until combined. Add eggs, one at a time, beating well after each addition. Beat in vanilla.

In a small bowl, combine sour cream and half-and-half. Combine the flour, baking soda and salt; add to the creamed mixture alternately with sour cream mixture, beating well after each
addition.

Pour into prepared pan. Bake at 350° for 55-60 minutes or until a toothpick inserted near the center comes out clean. Cool for 10 minutes before removing from pan to a wire rack to cool completely.

For drizzle, in a small bowl, combine water and remaining lavender. Cover and steep for 5 minutes. Strain, discarding lavender. In another small bowl, combine confectioners' sugar and enough infused water to achieve desired consistency; drizzle over cake. Garnish with additional lavender if desired. Yield: 12 servings.


Almond Lavender Cake photography, styling, and recipe by Rikki Snyder. Find more from Rikki on her website and on Instagram—@RikkiSnyder.

The Art of Cheese Making

Ben Ashby

SPROUT CREEK FARM

BY: RIKKI SNYDER

It’s always encouraging when you meet someone who has found their passion. For Colin McGrath, he was at the right place at the right time when he found his. Growing up on the west coast, Colin was always getting himself into some sort of trouble when he was younger. At the age of 14 he was given a rather large amount of community service and he decided to do his time working at a church nearby that had a small cafe. Ever since, he was enthralled with the world of food and started working at restaurants. By the time he was 18, Colin made the decision to pack his bags and move across the country to attend the prestigious Culinary Institute of America in Hyde Park, NY. 

    The Culinary offers a vigorous program and is surely the best place to be if you want to go into the food industry. Being very familiar with the school, as my father once attended it, I have a pretty good knowledge of what goes on there. So when I met Colin I had to stop myself from bluntly asking, “How in the world did you end up at Sprout Creek Farm making cheese?!”. And after we got to talking I realized that wow, he really was just in the right place at the right time. 

    Sprout Creek Farm in Poughkeepsie, NY is a charming little working farm nestled away in the heart of the Hudson Valley. It’s less than a mile down the road from where I grew up and because of the close proximity we would walk to the farm for field trips in grade school. So much of the farm and staff is dedicated to educating children about the natural world, community and agriculture. I have fond memories of spending days there, cooking vegetable soup in the kitchen with my classmates and standing out in the barns with the goats as they nibbled on my KEDS. 

    In the more recent years, Sprout Creek Farm has expanded into the world of artisan cheese and is now one of the go to weekend getaway places in the Hudson Valley for those living in the city. It’s just a short train ride away and hey, who doesn’t want to spend the day at a beautiful farm eating delicious hand crafted cheese? They have won 3, 2nd place awards in the American Cheese Society Competition and are also on the list of Wine Spectator’s 100 Best Cheeses. So this brings me back to my question at hand, how did Colin end up at Sprout Creek Farm making cheese? 

    With Sprout Creek only being a short 20 minute ride from the Culinary, Colin was first introduced to the farm as a student. “By chance I knocked on their door at the right minute and was able to land a spot in the creamery,” he says. Simple as that. He quickly became captivated with cheese and everything that goes into the process of making it. “It is something that is always on my mind, even when I don’t want it to be,” Colin says. After working here for many years, Colin is just as much in love with his job as he was the first day he started. He works with a wonderful group of people that all share his same love and passion for cheese and is constantly experimenting and producing new products. 

    After being behind the scenes where the cheese is made and watching it happen first hand, my whole perspective on the art of cheese making has changed. As I was observing Colin at work, I started to realize just how much goes into making a batch of cheese that I had absolutely no knowledge of. It was almost as if I was watching a mad scientist in his laboratory. Colin would look at the clock and jot something down on his charts, he had different colorful bottles of liquids and would mix something in a small cup then leave the room to go put it in the fridge to only take it out minutes later. 

    All of it is so intriguing and to my surprise, the better half of Colin’s day is spent not making the cheese, but cleaning and making sure everything is sterilized in between batches. They get the milk for their cheese fresh from the cows and goats they have at the farm. It is then turned into curds that will eventually be turned into wheels of cheese and only takes a few hours to complete. In that time, 2 ingredients are added and multiple steps are taken to separate the solids from the milk, get them into wheel form and then get them set up with the right components in order for them to ripen effectively. The range of age in their cheeses is anywhere from 2 days to 2 years. Each one requires a different length of time based on many different factors that control the ripening rate. And based on that age there will be different characteristics in texture and taste. Not only this, but weather, feed, stage of location, health and mood of the animal will all alter the composition of the milk and overall taste of each cheese. However, as Colin points out, you can’t forget the most important step to the cheese making process, adding love. 

    Sprout Creek farm distributes their cheese throughout the Northeast with a large emphasis on New York City. Their cheeses can be purchased at any Whole Foods store in this region as well as online at sproutcreekfarm.org. Grab a glass of wine or beer and be ready to sample some of the finest, local made, artisan cheese there is.  

Cinnamon Hot Chocolate

Ben Ashby

Before we go any further there is one thing that I must confess, I have a huge sweet tooth. And I mean huge. However, if there was one flavor that I could ever love more than chocolate it would be cinnamon. And so, you can imagine my excitement when the two are combined. This hot cocoa is nothing short of delightful and is a great drink to sip on a cold winter evening. It will warm your bones, and liven your taste buds. 


Cinnamon Hot Chocolate

BY: RIKKI SNYDER


3 ounces semisweet chocolate

1 Tablespoon sugar

1 teaspoon ground cinnamon

2 cups milk

1/2 teaspoon vanilla

A few drops of almond extract

Whipped cream, chocolate shavings and cinnamon sticks for garnish.


Cut chocolate into pieces and place in blender or food processor. Add sugar and cinnamon. Cover and blend or process until finely ground. Cook and stir chocolate mixture and milk in a large saucepan over low heat about 10 minutes or until chocolate melts. Remove saucepan from heat; stir in vanilla and almond extract. Beat with a rotary beater until very frothy. Serve in mugs. Top with whipped cream, chocolate shavings and cinnamon sticks if desired. Makes about 4 (8-ounce) servings.