Contact Us

Use the form on the right to contact us.

You can edit the text in this area, and change where the contact form on the right submits to, by entering edit mode using the modes on the bottom right. 


123 Street Avenue, City Town, 99999

(123) 555-6789

email@address.com


You can set your address, phone number, email and site description in the settings tab.
Link to read me page with more information.

CONTENT

Filtering by Category: recipe

Gooey Butter Cake

Ben Ashby

There aren’t many recipes as easy as this one. A very humble dish, that becomes a non-complicated go to. This gooey butter cake recipe is perfect to make as a snack or a dessert and will likely remind you of a chess bar, but is much easier to make.

RECIPE

Preheat oven to 350 and grease a 13x9 baking dish.

Crust: 1 box yellow cake mix, one beaten egg, 1 stick melted oleo. Combine ingredients to form a dense dough. Spread along bottom and sides of a well greased baking dish.

Filling: 1 pound powdered sugar, 2 beaten eggs, 1 block softened cream cheese, 2 teaspoons good vanilla.. Whip together until fluffy. Pour over crust. Bake for 30 minutes or until golden. An over-baked cake will be less gooey than you’d like, but still delicious.

Classic Orange Juice Cake Recipe

Ben Ashby

Orange Juice Cake

This recipe was a staple for every church potluck, funeral dinner, or just a go-to everyday cake. It’s super moist like pound cake.


1 box yellow cake mix

1 box instant vanilla pudding

4 eggs

½ cup vegetable oil

1 cup orange juice

¼ cup brown sugar 

¼ cup pecans, chopped


GLAZE

½ cup butter

1 cup sugar

¼ cup orange juice


1. Preheat oven to 325 degrees. Mix cake mix, pudding mix, eggs, oil, and orange juice together.

2. Grease Bundt pan. Spread brown sugar and chopped nuts in the bottom.

3. Pour batter in pan; bake 35–40 minutes.

4. For glaze, melt butter in saucepan, add sugar, orange juice; bring to boil, stirring constantly.

5. After removing cake from oven, pour glaze on cake; cool 15–20 minutes; then invert onto plate.

Fried Apple Pies (with Canned Biscuits)

Ben Ashby

I hadn’t had one of these in over twenty years. As I thought about them the week before I was convinced they had to have been something I dreamt, not a long forgotten relic of my childhood, but the more I workshopped this recipe in my head I realized it was a dessert and a scene I had had many times before. When I was a child my aunt would make fried apple pies. I remember her making them here, in her brother’s kitchen rather than her own. Yesterday I made them based on those nearly forgotten memories. Part of me felt wrong in making them on the counter by the sink rather than to the right of the stove. The memory in my mind of Aunt June making them here in this kitchen was her standing in front of the stove, me on a stool beside her by the door into the then dining room. Each of the canned biscuits, Grands, the buttery kind were rolled out as thin as possible, and apples were spooned on. The apples back then would have come from the orchard out back, the orchard that the tornado carried away a couple years ago. She would spice the apples with cinnamon and sugar, and most likely that canned mix called Apple Pie Spice. A fork, taken from the same drawer I took one today would have been used to crimp the edges to hold the apples in. Then in a cast iron skillet, perhaps the very one I used today would be filled with a half inch of oil, heated, and the pies each placed in and fried until golden brown. The pies removed from the skillet and laid to rest on a paper towel lined plate. The same plate surely still in my cabinet next to the window. Watching the pies fry today, in that skillet, in this kitchen, on one of the final fleeting days of fall felt like a walk into the past, it felt good, it felt like a place one should visit whenever one can.

FRIED APPLE PIES (WITH CANNED BISCUITS)

1 Can Grands Biscuits

3 apples, variety doesn’t matter) cooked and seasoned in a baked apple fashion

For these photos I used our apple pie jam as filling as a substitute for the baked apples. It works just as well, especially if apples aren’t on hand and the jam is.

For the recipe I would recommend pealing and slicing your apples into thin wedges. Add to a small pot on medium heat. Add about two inches of water, 1/2 cup sugar and whatever cinnamon/nutmeg/apple pie spice combination you’d like. Allow to cook until the apples are tender.

For the dough take each biscuit and roll as thin as possible. Keep the circular shape. Once rolled spoon in the apple filling on one side of the dough, the other side will be folded over. Leave 1/4 to 1/2 inch edge to allow for crimping.

Fold the other side of the dough over to create a half circle. Using a fork crimp (press down) the edges all the way around to bond the two edges together.

In about 1/2 inch of oil in a skillet over medium heat fry your apple pies until golden brown on each side. Remove to a paper towel lined plate to drain excess oil and to cool.

Serve warm. Can keep in the fridge and be reheated for two to three days.

Strawberry Bread Pudding Recipe

Ben Ashby

I feel fairly confident when I say this was the best bread pudding I’ve ever made. I wanted to make a very specific one that felt light after how cold the temperatures had been last week.

In my mind the season for heavy, spice filled desserts had passed. Pumpkin spice season starts in august and blends into gingerbread season, and by January it is time for a flavor cleanse. For many it is time for citrus, and I fully agree, but for me, after the past year at the farm, I wanted something that felt like spring.

Bread pudding is probably my signature dish. I grew up hearing stories of my great grandmother making bread pudding in my kitchen and this in a way connects me to her.

I knew we were launching a new strawberry jam label and I was trying to think of a way to work our strawberry jam into a dessert recipe to serve at one of our luncheons. I asked Christie if she’d ever had strawberry jam in a bread pudding and we quickly workshopped this recipe to life.

The key to this keeping its fresh light flavor and feel is not cooking the strawberry jam. I whipped it with softened cream cheese to create a topping for the bread pudding rather than folding it into the baked mixture like I do with apple butter in the fall.

In October Laurie had been on a brioche kick and I ended up with a loaf in the freezer. I typically have my freezer full of frozen Amish Friendship Bread, but for this recipe I wanted to use her brioche.


A couple of years ago someone recommended that I use sweetened condensed milk in my bread pudding and it has been a game changer, for this recipe though I went one step further and used dulce de leche for the base.

THE RECIPE

1 Loaf Brioche or other bread. (Whole Foods makes an amazing brioche)

1 can dulce de leche

1 cup whole milk

4 eggs

1 cup white sugar

2 teaspoons quality vanilla extract

1/2 cup chopped candied pecans


Mix together all ingredients, excluding the bread in a large mixing bowl. Cube bread into rough one inch cubes. You can use any bread, but I prefer one with a bit of sweetness. Amish Friendship Bread, Brioche, or even a sourdough work perfectly. Add cubed bread to the wet mixture and stir to coat a decent amount of the bread. Pour into a well greased baking sheet. A 9x9 or 10 inch round pan work well.


Cover with foil (to prevent the top from burning) and bake in a 350 degree oven for forty minutes to one hour or until the wet mixture has sat.

Top with your favorite whipped cream and the strawberry cream cheese mixture. For this recipe I whipped one of our half pint strawberry jams with a softened block of cream cheese and whipped in a stand mixer until fluffy. Serve warm or cold. Keeps well for two to three days, but is usually eaten long before that.

Our strawberry jam is grown here in our county and is made using the freshest berries possible. All grown on a local farm the old fashioned way. If you are using a store bought jam for this recipe use the very best you can find.

Southern Cornbread: A Story by @bethkirby

Ben Ashby

Our lives are like layers of soil, histories heaped upon histories, stratified by the major events in our lives. We can rediscover all manner of fossils and artifacts, and in turn fertile topsoil can cover the volcanic ash of the past. We have an infinite capacity for growth, rediscovery, and change, and as I’ve gotten older I’ve rediscovered many things: my feet on the earth, the kitchen, and Tennessee.
— Elizabeth Kirby


My grandmother’s cornbread was a crisp golden brown. It was cast iron. It was a mason jar of bacon grease kept in the cupboard and a jug of buttermilk in the door of the Frigidaire. It was “home again home again jiggity jog”. It was Lincoln logs. It was sitting at her dining room table looking out the sliding glass door onto the back porch where we cracked walnuts and my brother and I smeared lighting bugs onto the pavement in senseless acts of childhood iridescence. It was torn into pieces into a glass of milk and eaten with a spoon. It was badminton and the smell of birdseed. It was childhood, and it was her.

Until a month or so ago when I finally decided to make it myself, I hadn’t tasted cornbread like hers in fifteen years, really didn’t eat cornbread at all. Didn’t bake it either. It might as well of died along with her when I was fourteen. At least it seemed that way for far too long. I didn’t expect her to die when she did. I wasn’t prepared. I hadn’t taken notes. I didn’t know what they would do with all her preserves, and I wept. There just didn’t seem to be anything to be done about any of it. It was hard, losing her, and for a few weeks I tried to pretend it simply hadn’t happened. She was like a second mother, and it appeared to me like some impossible necromancy to attempt to make that cornbread, so I just never did. Grandmother was dead, and cornbread was over. That was just how it was or so it seemed. Around the time she passed away I was beginning to develop that girlish sort of madness common at that age, and over the course of my adolescence I drifted farther and farther into the self-obsession that is being a teenager, and by the end I’d forgotten about cornbread, fireflies, badminton, and all that.

But. That was not that. Our lives are like layers of soil, histories heaped upon histories, stratified by the major events in our lives. We can rediscover all manner of fossils and artifacts, and in turn fertile topsoil can cover the volcanic ash of the past. We have an infinite capacity for growth, rediscovery, and change, and as I’ve gotten older I’ve rediscovered many things: my feet on the earth, the kitchen, and Tennessee. In this past year I’ve also put many things behind me, and as I form a new layer in the geological history of my life there is again cornbread and cast iron and therein lie fragments of the intricate, complicated histories of both myself and the south.

Cornbread in milk (or buttermilk) is an older southern midnight snack: when the day’s cornbread had become dry it was torn into pieces and soaked in milk and eaten with a spoon. Last month I sat at my dining room table and eagerly crumbled a piece of cornbread into a glass of raw milk for the first time in fifteen years. The taste possessed the same immediacy of memory as a familiar scent. I almost cried. I was effervescent, prattling on in excitement about how “it’s just like...just like”. None of it was gone at all, not her, not cornbread.

As for the ingredients, I use freshly milled corn from both Simple Gifts Farm (a beautiful roughly hewn mix of blue, red, and yellow corn from the Signal Mountain market on Thursdays) and River Ridge Mills (a finer textured yellow corn from the Main Street market on Wednesdays). I prefer to use the former for the coconut cornbread and the latter for the buttermilk as it gives it the most traditional taste and texture, the one I remember. I use Cruze Farms Buttermilk and bacon grease from Link 41 bacon that I save in a dedicated mason jar. I often use canola oil or coconut oil in place of the bacon grease in the buttermilk cornbread, content to merely smear the bacon drippings on my pan.

CAST IRON CORNBREAD

Whether you like it slathered in butter or drizzled with honey, plain or with milk like I take mine, each of these two variations has it’s own virtues. So I give you cast iron cornbread, two ways: the classic buttermilk and bacon grease cornbread of my youth and my own nouveau southern interpretation using coconut oil and cultured coconut milk. Southern food is an ever evolving, living organism with new innovations constantly being born of traditional recipes, and I think making the food your own is important. It keeps our cuisine vital. So feel free to play with fats, the cornmeal, the liquid, and various flavorings. I’m a purist so I don’t tend to put cheese and the like in my cornbread, but that doesn’t mean you can’t. These recipes are blank slates for endless sweet and savory variations if you like.

BUTTERMILK BACON GREASE CORNBREAD

Ingredients

1 1/4 cup (175 g) cornmeal

3 tablespoons flour

1 teaspoon salt

3/4 teaspoon baking powder

3 tablespoon bacon grease, vegetable oil, or shortening

2 eggs, lightly beaten

1 cup (240 g) buttermilk

1/4 teaspoon baking soda, dissolved in a bit of water

Bacon grease for greasing the pan

Heat oven to 425°. Grease a cast iron skillet with bacon grease and place in the oven while it heats. Mix the first four ingredients in a medium mixing bowl. Cut in the fat with your fingers or two knives, mixing well until you have a sandy texture. Combine the eggs and the buttermilk, add to the dry ingredients, and mix to combine well. Add the baking soda and stir to combine. Pour the mixture into the hot skillet and bake for 20 minutes. Invert onto a plate. I like to serve it upside down with the nice crispy side up like she did.

CULTURED COCONUT MILK CORNBREAD

Variation

Substitute 3 tablespoons refined coconut oil (you need refined coconut oil as opposed to unrefined to withstand the heat of baking) for the vegetable oil, and 1 cup of cultured coconut milk (can be found in the dairy aisle usually next the kefir) for the buttermilk. Grease the skillet with the coconut oil as opposed to bacon grease.


Figgy Pudding by @alwayswithbutter

Ben Ashby

Figgy pudding is a Christmas dessert traditional for many, but brand new to me. Pies always reigned in my family, never going outside that realm. But when thinking about something new to try I couldn’t help but be inspired by the Charles Dickens classic, A Christmas Carol. I look forward to seeing the play every holiday season. It’s the same production every year, and every year that mysterious figgy pudding gets mentioned. So after scouring Internet, I found an old recipe that I could adapt into own. Reminiscent of a bread pudding and fruit cake, this figgy pudding is my new holiday classic.


Figgy Pudding (from FOLK’s Christmas 2012 Issue)

STORY: JULIE MARIE CRAIG


1 cup butter, softened

1 cup brown sugar

1/2 cup molasses

3 eggs, separated

1/2 tsp cinnamon

1/4 tsp of each, nutmeg, allspice and ginger

1 cup flour

2 tsp baking powder

1 apple, peeled, cored and finely chopped

1 pound dried figs, finely chopped

Grated peel of 1 orange

1 cup almonds, finely chopped

1 1/2 cups dried bread crumbs

1/2 cup dried cherries, chopped

1 cup milk

2 tbsp rum


Sift together flour, baking powder, cinnamon, nutmeg, allspice and ginger. Set aside.

Combine milk and rum. Set aside.

Cream together butter and brown sugar. Add in the egg yolks then molasses.


Add in about half the flour mixture. Once combined, add in half of the milk mixture.

Then the remaining flour mixture, mix, and then the milk mixture.


Fold in the apple, figs, orange zest, almonds, cherries and dried bread crumbs.

In a separate bowl, beat egg whites until stiff peaks. Then gently fold into the batter.

Pour into a two-quart buttered bowl or pudding mold. Then cover top with parchment paper or foil.


Place in a large saucepan, fill with boiling water to 2/3 of the mold is in water.

Steam over simmering water for 4 hours, or until it is risen and toothpick comes out clean.

Serve warm.


Sweet Traditions: Christmas Recipes from Home

Ben Ashby

I have enjoyed coming into your home every other month and sharing with you easy recipes from the heart of Kentucky.  I hope that you have tried a few to share with your family and friends. I simply share with you things that I love and hope that you will love them too! I wish for you a blessed holiday season, filled with love, laughter, and good food — blessings, Sandy


DATE PUDDING

1 cup dates, cut fine

1 teaspoon soda

1 cup boiling water

1 tablespoon butter

1 cup sugar

1 egg, beaten

½ teaspoon nutmeg

1 cup all-purpose flour

1 teaspoon cinnamon

½ teaspoon ground cloves

½ cup chopped pecans

1 teaspoon vanilla

Whipped cream for topping

Place dates and soda in a small bowl and pour boiling water over them. Let cool.  Cream butter and sugar, add beaten egg. Add flour, nutmeg, cinnamon, cloves and pecans.  Mix well.  Add date mixture and mix.  Add vanilla.  Pour in 8x8 inch pan.  Bake at 325 for 30 minutes.  Cool.  Store in refrigerator; top with whipped cream when serving.

*This is my friend Sheila’s mom’s recipe, Sheila said that her mom used to make Date Pudding every Christmas.  Thanks to Sheila and her mom, Doris Jean*

DANISH WEDDING COOKIES

½ cup butter, room temperature

¼ cup powdered sugar

1 teaspoon vanilla

1 cup all-purpose flour

1/8 teaspoon salt

1 cup finely chopped walnuts or pecans

Powdered sugar for rolling

Beat butter and sugar until creamy.  Mix in vanilla.  Add flour and salt.  Beat until smooth.  Stir in nuts.  Shape into ½ in balls.  Place on ungreased cookie sheet.  Flatten slightly.  Bake at 350 for 15 minutes until lightly browned.  Remove from oven.  Quickly roll hot cookies in powdered sugar.  Completely cool and roll in powdered sugar again.  Store in airtight container at room temperature.


SUMPTUOUS BREAD PUDDING WITH CHANTILLY SAUCE


1 (1lb) loaf French Bread

1 quart half & half or whole milk

3 eggs beaten

½ cup white sugar

½ cup brown sugar

1 cup chopped dates

½ cup chopped black walnuts

2 tablespoon vanilla extract

1 teaspoon cinnamon

1 teaspoon nutmeg

½ cup butter, cubed

If you cannot get day old bread, leave the loaf out overnight.  Break bread into bite-size chunks in a very large bowl.  Add half & half, squish the mixture well with your hands (you can wear gloves if you wish).  Mix the eggs, sugars, vanilla, spices, dates and walnuts.  Spoon the batter into a sprayed or buttered 9x13 glass pan.  Cut chunks of butter and place on top of mixture.  Sprinkle additional cinnamon and sugar over entire surface.  Bake at 325 for 30-40 minutes or until the pudding is firm; the middle might be a little more soft than the edges.


CHANTILLY SAUCE

1 pint half and half

2 cup powdered sugar

½ stick butter

1 teaspoon Vanilla

½ teaspoon Nutmeg


Slowly heat the half & half with the butter until the butter melts.  While this is heating, add a little milk to the powdered sugar until it becomes a liquid.  Pour the sugar mixture in to the warm milk stirring so it won’t lump.  Let this cook until the cream gets smooth but not thick.  Add the vanilla and nutmeg.  Serve this warm over the bread pudding.  Sumptuously delicious!

A New Heritage: Christmas with @mustloveherbs

Ben Ashby

Deep in the eastern Kentucky mountains Lauren of @mustloveherbs is creating a new style of heritage.

LAUREN, A TEACHER BY TRAINING, IS AN AVID BAKER, GARDENER AND FORAGER. Her New Heritage style of cooking embraces using ingredients at hand, while paying homage to tradition and old-fashioned simplicity. She loves spending her time reinventing traditional family recipes to fit today’s tastes and ingredients. Lauren’s kitchen garden not only feeds her household in the warm months, but also throughout the winter by utilizing many ancestral food preservation techniques.

Where do you live? Where did you grow up? I live in the Appalachian Mountains of Eastern Kentucky, in the same small town I’ve lived in all my life. My family’s roots in this area run over 200 years deep. The road I grew up on was actually named after my great-great-great-grandmother. 

Tell me a little about yourself. I grew up in an a very artistic family. My mother is a teacher with a degree in developmental psychology, and has a gift for decorating and making things beautiful. My father is a talented musician who owns a recording studio/production company. I grew up in a home with a beautiful garden, next door to my grandparents. My grandfather, Big Daddy, had an acre garden and a greenhouse; this is where my love of gardening started. My family spent a lot of time together. We were known to share multiple pots of coffee and stacks of magazines in the evenings.  I met my now-husband when I was a junior in high school. We have traveled, remodeled, and raised 5 wonderful pups together in our 13 years of marriage! So much of who I am now, I can attribute to his love and support. 

What role have food and cooking played in your life? When did you start cooking? I come from a long line of very good “country cooks” as well as professional bakers. I was taught at a very young age how to string beans and peel potatoes. My grandmother would put a chair at the kitchen sink for me while she cooked, and let me make my “stews” with scraps from whatever meal she was cooking. I truly felt like I was making something delicious along with her. As I got older, she taught me how to correctly make gravy and cornbread, along with countless other meals. 

Who taught you to cook? Was your family culinary? My maternal grandmother, Meme, taught me how to cook. My mother and father are both excellent cooks, but were afraid I would burn the house down. My grandmother often nearly burnt the house down herself, so that didn’t faze her. 

When did you first realize you had a passion for cooking? Around the age of 5. I have always been drawn to the kitchen. If someone was cooking, that was exactly where I wanted to be. Seeing someone stir a pan of gravy is almost hypnotic to me. 

What is it about food and cooking culture, or dining, that you love? I adore that we can share so much of who we are through cooking. Heritage is often spoken through a dish or while enjoying one. Cooking bonds people by allowing us to try new things together or to enjoy comfort foods that bring back the fondest of childhood memories.


How would you describe your cooking style? New Heritage -- country cooking that has been updated only when it needs to be, in order to adapt to today’s ingredients. 

Where do you find ideas and inspiration for your recipes? My biggest inspiration is my garden. In the winter this often means I pull out things I’ve stored from summer harvests or use what is in season, such as apples, root vegetables and cold-weather greens.  I am also heavily inspired by family recipes. Lately I have been doing my best to make my grandmother’s Christmas cookie recipes! They are a family tradition that I am determined to get right.

What is your favorite thing to cook for others? Bread. Whether it is cornbread, biscuits, focaccia or even a Babka, everyone loves bread! 

What is your favorite item in your kitchen? My favorite kitchen item is my grandmother’s cast iron skillet. It was originally my great-great-grandmother’s. She received it as a wedding gift in 1919. It has been passed down through the generations of our family ever since. 

What has been your biggest challenge with your cooking? Your biggest accomplishment? My biggest challenge has to be my newly-developed red meat allergy. Being Appalachian means that pork goes into nearly any dish. Cornbread is often made using bacon grease. Soup beans aren’t complete without a ham hock. Making all of my favorite meals taste just as good without using pork has been my proudest moment. Even my pork-loving momma said, “they taste just like Granny’s” when referring to my fresh green beans.


CHOCOLATE & PEPPERMINT BARK


Ingredients:

12 ounces semi sweet chocolate (chips or bars)

Chopped old fashioned peppermint candy sticks and/or candy canes

Holiday themed sprinkles


Directions:

Prepare a baking sheet with parchment paper and set aside.


Melt the chocolate in a microwave-safe bowl using 30-second increments. Stir after each increment. When the chocolate is nearly all melted remove it from the microwave and continue to stir until it becomes smooth and glossy.


Pour the melted chocolate onto your prepared baking sheet and smooth it out until desired thickness is achieved.


Sprinkle the peppermint candies and sprinkles evenly over the melted chocolate. You may need to lightly press in some of the ingredients.

Allow the chocolate to cool at room temperature for 3-4 hours before breaking. You can also place in the fridge for 30 minutes if you are in a pinch.

Once completely hardened, carefully break apart the chocolate using your hands. Store in an airtight container until ready to serve or gift!


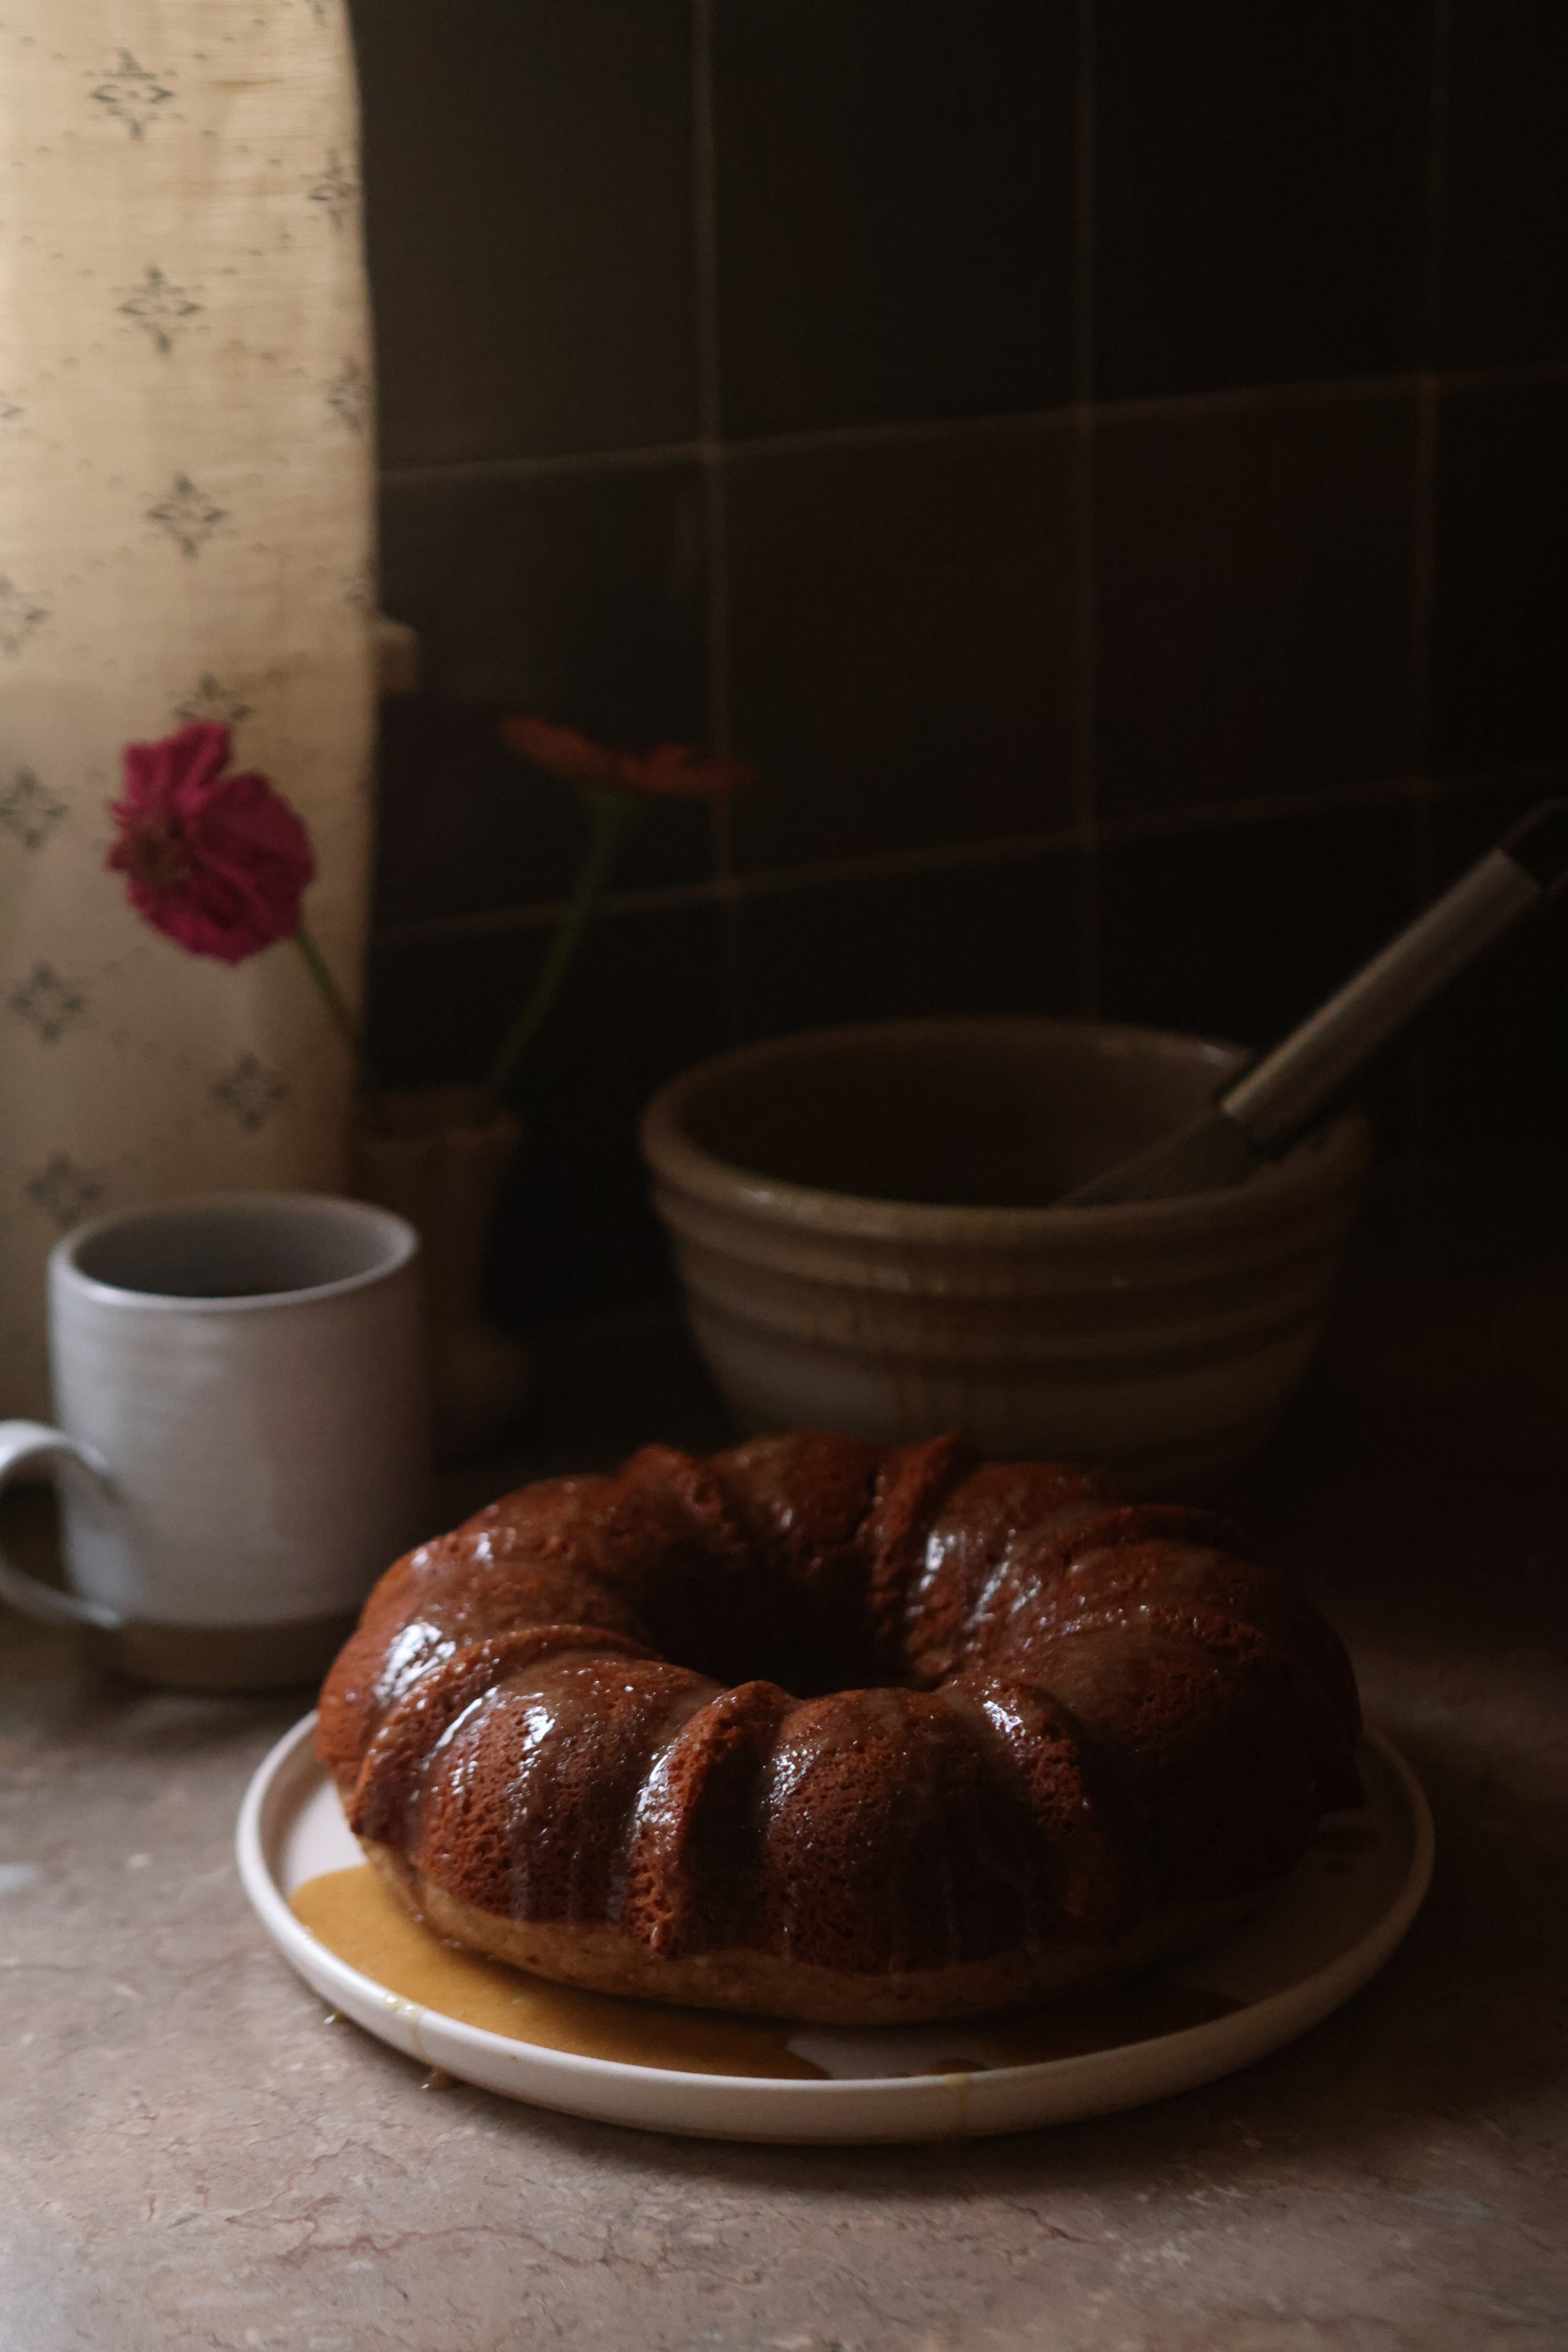
CRANBERRY, ROSEMARY & ORANGE CAKE WITH ORANGE CREAM CHEESE FROSTING

Ingredients for Cake:

⁃3 cups of flour + more for dusting

⁃1/2 tsp of Baking Soda

⁃1/2 tsp of Baking Powder

⁃1/2 tsp of Salt

⁃Zest of 3 oranges

⁃Juice of 1 orange

⁃Zest and juice of 1 lemon

⁃3/4 cup of buttermilk

-2 cups of cranberries

-2 sticks of butter (1 cup) at room temperature

⁃2 cups of sugar

⁃2 tsp of vanilla

⁃5 eggs

⁃2 tbs of fresh rosemary

Ingredients for Icing:

⁃2 cups of confectioners sugar

⁃4 oz. cream cheese at room temperature

⁃1/2 tsp vanilla extract

⁃3 tsp freshly squeezed orange juice.

Directions for Cake:

Preheat the oven to 350°.

Grease and flour your Bundt pan.

In a medium bowl combine 3 cups of flour, baking powder, baking soda & salt. In a small bowl combine the zest and juice of the oranges and lemon with the buttermilk. Set aside.

In a separate bowl add the cranberries and 2 tbs all purpose flour. Stir until all the cranberries are completely covered in flour. Set aside.

In your stand mixer cream together the butter and sugar until light and fluffy. Add in the vanilla. Add the eggs in one at a time. After all eggs are added turn the mixer off and scrape the bottom and sides of the bowl making sure there isn’t any unmixed butter and sugar.

With the mixer on low add the buttermilk and flour mixtures to your butter & sugar mixture by alternating between flour and buttermilk until both are gone. Add the rosemary in and mix until evenly distributed.


Take the cranberry and flour mixture and fold it gently into your batter. Make sure the cranberries are even throughout the batter but do not over mix.

Pour the batter into your greased bundt pan and bake for about 40-45 minutes, until a toothpick inserted in the middle of the cake comes out clean.

Allow the cake to cool in the pan for a minimum of 30 minutes. This is imperative to it coming out cleanly! After 30 minutes flip the cake out carefully onto a wire rack and allow to cool for another 30 minutes. While the cake cools you may prepare the icing.

Directions for Icing:

In a medium sized mixing bowl combine the confectioners sugar, cream cheese, vanilla and orange juice. Use an electric mixer on medium speed mixing thoroughly until icing is smooth and creamy. Add more juice 1/2 tsp at a time if the icing is too thick. Add powdered sugar in 1 tbs at a time if mixture is too runny. The consistency should be somewhere between a frosting and a glaze.

Spoon the icing evenly over the cake. It should spread nicely over the edges on its own.

FUDGE & ALMOND PINE CONES


Ingredients:

1 cup semi sweet chocolate chips

2 oz unsalted butter

Pinch of salt

7 oz sweetened condensed milk (1/2 a standard can)

1/2 tsp vanilla extract

2 cups sliced almonds


Directions: In a heat safe bowl combine the chocolate chips, butter, salt, condensed milk, and vanilla. Using the double boiler method, heat your ingredients. Be careful not to let the water touch the bottom of your bowl. Stir constantly until all the chocolate has melted and the mixture is smooth.

Take off heat immediately and place mixture in fridge to cool for 20-30 minutes.

The mixture should hold its form but still be moldable.

Form the chocolate mixture into a cone shape and place it on parchment paper. Begin sticking almonds into the bottom of the cone. Move your way up placing each row behind the next in an overlapping pattern until you reach the top. Place the finished pine cone in the fridge to set up for a minimum of 1 hour! Makes 15 pine cones! Recipe Can easily be doubled.

Springerle Stories: A Visit to Genesee Country Village

Ben Ashby

Share in this 500-year-old holiday cookie tradition courtesy of our friends at the Genesee Country Village and Museum

TEXT + RECIPE BY PAM FRIEDLER WITH DEANNA BERKEMEIER PHOTOGRAPHY BY GOOR STUDIO

SPRINGERLE IS A TYPE OF MOLDED COOKIE THAT HAS BEEN PREPARED FOR HUNDREDS OF YEARS. Some of the earliest springerle molds found in Switzerland date back as far as the 14th century. The molds used to make springerle were usually carved from wood or made of clay or metal. Some of the earliest images portrayed in springerle were Biblical scenes, and they were used to educate those who couldn’t read or write.

Eventually other scenes were carved, and the cookies soon reflected images of holidays, events, and scenes from everyday life. The cookies were also used to celebrate births, weddings, and used as betrothal tokens. Exchanging springerle during the holidays was a common practice very much like we exchange cards today.

Springerle are delightful cookies that take about three days to make, and the outcome is a splendidly embossed, tasty cookie that is lightly crisp outside and wonderfully soft inside. Once the cookies are molded, they must be left uncovered for 12 to 24 hours to set a crisp crust with a sharp, clear imprint that holds when baked.

Traditionally flavored with anise, one 1787 receipt (recipe) we have that was translated into English from the original German has the dough laid on top of a pan strewn with anise seeds as the flavoring. These days the flavor possibilities are only limited by your imagination and the wide variety of flavoring oils available on the market. Springerle can be stored up to three months in an airtight container, where the flavor will continue to develop over time.

At GCV&M, we strive for historical accuracy, therefore we have chosen to use a recipe that dates back to the 1600s but has been slightly altered to account for modern changes in flour milling and the fact that we no longer must pound our sugar from a solid loaf.

This recipe, from House on the Hill called “Perfection Springerle,” calls for a leavening agent called hartshorn or baker’s ammonia, aka ammonium carbonate. Hartshorn is a form of ammonia and gives the raw dough a distinct ammonia flavor that will completely disappear upon baking. Hartshorn produces the “spring” (leavening) that helps the cookie keep its delicate internal texture while retaining its crisp embossed top. You can always substitute an equal amount of baking powder for the hartshorn if you need to, but it is readily available online.


When painting the springerle, always mix your color with an alcohol, such as triple sec. Do not use water as it will soak into the cookie, whereas the alcohol will evaporate quickly and leave the surface dry. We paint them with powdered or very finely ground historical food coloring agents, such as beetroot, spinach, black walnut, turmeric, annatto, cinnamon, and cochineal, by mixing the powder with a small amount of triple sec. Most of these, in addition to powdered blueberry, tomato, pumpkin, and more, can readily be purchased online. You can also use the triple sec with modern gel food colors to paint the cookie.


HOUSE ON THE HILL PERFECTION SPRINGERLE COOKIES


These whisked-egg holiday cookies date back to at least the 1600s and were made in Bavaria, Switzerland, and the Alsace area of France. This recipe is just perfection for flavor, ease, and print quality. Historically, springerle were anise flavored. Anise seeds were scattered on the cookie sheet and the molded dough was placed on the seeds to dry before baking.


Makes 3 to 12 dozen cookies


1/2 teaspoon baker’s ammonia (hartshorn) or baking powder

2 tablespoons milk

6 large eggs, room temperature

6 cups powdered sugar

1/2 cup unsalted butter, softened but not melted

1/2 teaspoon salt

1/2 to 3/4 teaspoon anise oil

2-pound box sifted cake flour (Swansdown or Softasilk)

Grated rind of orange or lemon, optional (enhances flavor of traditional anise or citrus flavors)

More flour as needed


TO MAKE THE DOUGH


1. Dissolve hartshorn in milk and set aside for 30 to 60 minutes.

2. Beat eggs until thick and lemon-colored (10 to 20 minutes).

3. Slowly beat in the powdered sugar, then the softened butter. Add the hartshorn and milk, salt, preferred flavoring, and grated rind of lemon or orange, if desired.

4. Gradually beat in as much flour as you can with the mixer, then stir in the remainder of the 2 pounds of flour to make a stiff dough.

5. Turn onto floured surface and knead in enough flour to make a good print without sticking. Wrap dough tight in plastic wrap or zipper bag and refrigerate overnight.


TO MAKE THE COOKIES


6. On a floured surface, roll dough into a flat pancake approximately 3/8-inch thick. Roll thinner or thicker dough based on the depth of the carving in the cookie press you are using. Shallow carvings will need thinner dough, while deeper carvings will need thicker dough.

7. Flour your cookie mold for each and every pressing. Press the mold firmly and straight down into the dough.

8. Then lift, cut, and place the formed cookie onto a parchment-lined cookie sheet.

9. Do not cover the cookies while they dry. The goal of drying is to set the design. Let the cookies dry at least 12 hours; 24 hours is best. Larger cookies and warm humid weather may require longer drying times. Cookies that are not dried long enough will not retain the beautiful designs, but will taste fine.

10. Bake on parchment-lined cookie sheets at 255°F to 300°F until barely golden on the bottom for 10 to 15 minutes or more, depending on the size of the cookie.

11. Store in airtight containers or in zipper bags in the freezer. They keep for months, and improve with age.


GENESEE COUNTRY VILLAGE AND MUSEUM


Genesee Country Village and Museum is the largest living history museum in New York, the third largest in the country, and was founded with the goal of preserving and sharing architecture of the Genesee region with a focus on life in the 19th century. The founder of the Museum, the late John L. (Jack) Wehle, envisioned a museum village of authentic examples of 19th-century Genesee Country architecture, showcasing the art of typical village artisans. Beginning in 1966, buildings of the style, type, and function found in the rural communities of Western New York State were acquired and reconstructed in the configuration of an early Genesee Country hamlet. Genesee Country Village and Museum opened to the public in 1976 and eventually grew to 68 historic buildings, including a working 19th-century brewery.

The Museum also includes the John L. Wehle Gallery, which houses a world-renowned collection of wildlife and sporting art, and the exquisite Susan Greene Costume Collection, composed of 3,500 rare 19th-century garments and accessories. The Museum is also home to a Nature Center with over five miles of trails and a vintage baseball stadium, hosting a full season of games.

All year long, GCV&M runs a robust season of classes, events, and special programs. The Museum is located 20 miles southwest of Rochester and 50 miles from Buffalo.

Mazzarino Family Struffoli

Ben Ashby


  BY STACY MAZZARINO CURRIE


I WAS BROUGHT UP IN A TRADITIONAL ITALIAN AMERICAN HOME AND FOLLOW MANY ITALIAN TRADITIONS, like the Feast of the Seven Fishes on Christmas Eve, attending Midnight Mass, and of course making Struffoli, also known as Honey Balls. They are light, crispy little balls of deep fried dough, drenched in Honey and topped with colorful sprinkles. My family and I would gather around the kitchen table to make them together. Christmas music on the radio and elbow deep in flour, my dad and grandma would roll out the dough into thin strips, my brother and I would cut and roll the dough into balls and my mom would fry them. We used to fight over who would add the sprinkles at the end, and that’s still my favorite part! There was never a shortage of laughter and memory making, and 40 years later, we still carry on the tradition with our children. From generation to generation we continue to make memories and share our delicious treats with friends and family. My daughter Allie and my niece Segi particularly love these sweet treats and my niece asks to bake them throughout the year.


STRUFFOLI RECIPE


4 Cups Flour

Pinch of salt

6 Eggs

1 tsp Baking Powder

1 ½ tsp. Vanilla Extract

1 Jar Honey

Colorful Nonpareils/Sprinkles

Oil for frying

*Optional: Zest of an Orange


Combine flour, salt, eggs, baking powder, vanilla and zest together. Break off pieces and roll into long strips about 1/4 inch thick. Cut the strips into pieces and roll into little balls about the size of a small marble. Heat oil in a dutch oven and fry the balls in batches until puffed and golden brown. Drain on paper towels. Once they are all fried, heat honey in a small saucepan and pour over the balls, and immediately sprinkle with nonpareils. These stay nicely in a sealed container for up to a week.


When I think of Christmas I always think of Struffoli, a very sweet memory for our family. Though this year we will be making them in our separate houses, we will still carry on the tradition, together on Zoom.

Easy Sweetened Condensed Milk 3 Ingredient Microwave 3 Minute Fudge

Ben Ashby

This is one of those recipes that really couldn’t be more simple. You have without a doubt had this simple form of fudge before. It isn’t old fashioned fudge that is an absolute art form, but if you’re in a hurry this recipe feels like equal parts instant gratification and a nostalgic throwback. You can use milk chocolate or dark chocolate chips for this recipe, and likely could use peanut butter chips or white chocolate chips, but we prefer the classic semisweet.

THE RECIPE:

2 cups Semi-Sweet Chocolate Morsels

1 can (14 ounces) NESTLÉ LA LECHERA Sweetened Condensed Milk

1 teaspoon vanilla extract

Line an 8x8 baking pan with foil or heavily grease with butter. Combine morsels and sweetened condensed milk in large, microwave-safe dish. Microwave for 1 minute; stir until smooth. Stir in vanilla extract. Spread into prepared baking pan. Refrigerate for 2 hours. Lift from pan. Cut into pieces. Store in refrigerator.

Blueberry Peach Cast Iron Pie

Ben Ashby

I wanted to adapt our classic apple skillet pie with blueberries and peaches for the summer. I have a couple blueberry bushes in the orchard and they produced just enough berries for a pie. I brought back fresh peaches from my trip to Mississippi and they were practically begging to go into the pie. I fully believe this is the best pie recipe I’ve ever written.

BLUEBERRY PEACH CAST IRON PIE

1 cup brown sugar

1 stick of butter

2 pie crusts

1 tablespoon pumpkin pie spice

1 cup sugar

1/2 cup flour or cornstarch 

1 tablespoon lemon juice

Pinch salt

1 teaspoon vanilla

3 peaches pealed and sliced

Preheat oven to 350 degrees. Using a standard size cast iron skillet add the cup of brown sugar and stick of butter to the pan and put it into the oven. Leave until melted. Remove from oven. In a bowl mix all dry ingredients. Pour over blueberries. Gently fold in peaches, vanilla, and lemon juice. Cover skillet, butter, and sugar with a pie crust. I use store bought. Fill with berry and peach mixture. Top with remaining crust in whatever design you’d like. You can brush crust with an egg or butter wash to create a golden crust or sprinkle with sugar. Bake about 40 minutes. Serve hot or cold.

Summer-1959.jpg
Summer-1925.jpg

Old Fashioned Bread Pudding (Video)

Ben Ashby

A timeless southern classic that can be as simple or as complex as you’d like. This is the basic recipe with great cinnamon and vanilla flavors but can be added to easily. The key is using a really good bread. We use sourdough!

1 loaf sourdough bread

3 tablespoons butter, melted

½ cup raisins (Optional)

3 eggs, beaten  

2 cups whole milk or half and half

½ cup brown sugar

½ cup white sugar

1 teaspoon ground cinnamon or pumpkin pie spice

1 teaspoon vanilla extract

Whipped cream or caramel sauce for topping

Preheat oven to 350 degrees. 

Cube bread into 1 inch cubes. In a large bowl mix all ingredients and whisk well. Make sure eggs are well incorporated. Add bread to mix and allow to soak up the mixture. Turn out into a well greased baking pan. This will make a shallow 13x9 or a deep smaller dish. I use an oversized pie dish. Pour any remaining liquid over the dish. I will sprinkle with additional spices for more flavor. Bake for 45 minutes or until the liquid feels firm. Do not burn. You can cover with alluminum foil if desired. Will prevent top from becoming overly dry. Once cool top with whipped cream or caramel sauce and serve cold or hot. 

This recipe can easily be modified for additional flavors. Bourbon is a common addition. 

6 Sensational Soups to Save

Katie Westerfield

6 Sensational Soups to Save

Pin for later (or tonight.)

Not sure I’ve ever met a soup I didn’t like. It’s definitely a comfort food I don’t want to live without, so when I say this list is bringing me joy, you know it’s real. Here are some sensational soups you should check out. We’ll understand if they’re your new snow day go-to.

Spoon Fork Bacon Website

Spoon Fork Bacon Website

Creamy Tortellini, Sausage and Spinach Soup

Spoon Fork Bacon

Loaded with all the good things. Truly, this soup checks off many of my favorite foods. Grabbing my biggest spoon and coziest blanket for this one.

Platings + Pairings Instagram

Platings + Pairings Instagram

Hungarian Mushroom Soup with Fresh Dill

Platings + Pairings

Creamy and packed with flavor, the basis of a perfect soup. Unique but worth whipping up to share with friends or keep to yourself.

Zestful Kitchen Website

Zestful Kitchen Website

Creamy Broccoli Soup with Cheesy “Everything” Spiced Croutons

Zestful Kitchen

You read the name, do you need any more convincing? Over here wishing these bowls were currently in front of me. Comfort and joy, indeed.

The Lemon Apron Website

The Lemon Apron Website

Parsnip, Rosemary and Mixed Nuts Soup

The Lemon Apron

A combination that just seems to work. A new, fun, and delicious way to use up your in season veggies. Give it a try and let us know what you think.

Kim’s Cravings Website

Kim’s Cravings Website

Vegetable Beef Soup

Kim’s Cravings

For those that crave a hearty soup, hello. Something about vegetable soup is so nostalgic and cozy. Paired with a filling beef and we’re talking next level. And I’m okay with that.

The Cookie Rookie Instagram

The Cookie Rookie Instagram

Creamy Chicken Soup

The Cookie Rookie

When you just need a little pick me up. A family recipe to bring in to your life and never let go. A classic. A strong yes.

Not Your Mama’s Pumpkin Pie

Katie Westerfield

Not Your Mama’s Pumpkin Pie

No offense.

The Thanksgiving take over. These unique twists on an autumn staple are well worth a double-take. Untraditional, maybe, but this year is all about the “new normal.” So let us know, which recipe are you adding to the menu?

Chai Pumpkin Pie with Maple Whipped Cream

Half Baked Harvest

Can anyone else just smell the goodness in this image? It’s got me day dreaming over here, friends! One large slice of pie with two scoops whipped cream, please and thank you.

Pumpkin Meringue Pie

Preppy Kitchen

Mile high meringue for the Thanksgiving win. Also, spoiler, this sweet treat does include some bourbon because, I mean, why not?

Savory Pumpkin Pie with Whole Grain Crust, Mushrooms, and Toasted Hazelnuts

The Hungry Apron

Savory as pie. Is that a thing? I love how different this dish is. There is something so warm and cozy about it. And honestly, I’ll try anything by The Hungry Apron once.

Pumpkin & Caramel Pie

The Kitchen McCabe

Name a better duo. I don’t think you can go wrong here. Two fall must-haves (read needs) coming together for a very perfect Thanksgiving finale.

Apple Pumpkin Pie with Maple Whipped Cream

Baran Bakery

Another maple whipped cream and I just feel really thankful for that. Plus the touch of Americana apple. Very homey and sounds like a second plate.

Maple Pumpkin Pie

Going for Grace

Maple pumpkin just feels like autumn, don’t fight me on this. Sugar and spice and everything nice has never been so true. Try it for yourself.

Keep up with all our stories by following along on Instagram and subscribing to our newsletter.

Homemade Pumpkin Pie

Ben Ashby

825A3612.JPG

I have said for years that the best pumpkin pie is made with a Libby’s can. Most years I will eat any pumpkin pie, anywhere. For a very long time pumpkin pie was one of my favorite foods. I eventually burnt myself out on store bought and canned pies. This year though my desire for pie had returned…but I wanted to make it myself.

If you’ve followed along this year, you know I bought way too many pumpkins. I’ve been baking them as fast as I can. A few weeks ago I knew I was making my pumpkin soup recipe, but I didn’t want to make a huge amount. I decided to use half of the pumpkin for soup and the other half for pies. Before this year I had never baked a full pumpkin, but I am finding it far easier than you’d imagine.

For this pie you can bake, bowl, or even throw the pumpkin in a crock-pot. I prefer to bake the pumpkin in the oven so you get the natural sugars to caramelize, but it takes a rather long time. Boiling it takes about 20-30 minutes. A crock-pot will take hours…as you’d expect.

825A1743.JPG

BAKING THE PUMPKIN IN THE OVEN:

If you are baking your pumpkin it is incredibly easy. Start with a medium size baking pumpkin….I use amish pie pumpkins or fairytale pumpkins. You can truly use any that you’d like. Cut a whole in the top. Remove the guts and seeds. Once cleaned you can throw in a few tablespoons of butter and dust the inside of the pumpkin with pumpkin pie spice. This is totally unnecessary, but it makes a more festive feel.

Put the pumpkin on a baking sheet. I prefer to use one with a fairly deep lip. Place in the middle rack of your oven and bake on 400 degrees for 3-4 hours. You can wrap the pumpkin in a dome of foil, but that isn’t necessary. It is totally fine for the skin to burn. You will throw that away. Bake until the pumpkin is tender. Check it every hour. The pumpkin will deflate as the water cooks out.

Once the pumpkin is tender remove from the oven and allow to cool. Once it is cool enough to touch take a large spoon and scoop out the pumpkin. There will be a decent amount of water still remaining. Drain this off.

Once your pumpkin (about two cups) is scooped out, drained, and in a large mixing bowl add: two eggs, 1 cup of brown sugar, 1/4 cup of white sugar, 1/2 teaspoon salt, 2 tablespoons pumpkin pie spice, a 12 ounce can of sweetened condensed milk, 1/2 cup heavy whipping cream, and 1 teaspoon corn starch.

This recipe will fill two store bought pie shells.

Once all ingredients are combined pour into pie shells. Place on a baking sheet and into a 400 degree oven for one hour. Loosely cover the top of pies with foil. After the hour if the pie doesn’t feel fully set reduce heat to 350 and bake in ten minute increments until the pie is firm. Be careful not to burn your crust.

Once fully baked allow to cool before serving. This will help it continue to firm.

825A1758.JPG


** The sweetened condensed milk is what gives this pie such a rich and dreamy texture and taste. If you would like change up the spices. Use fresh nutmeg or ginger for a stronger and sharper taste. I use a lot of brown sugar in this recipe. I prefer the caramel flavor it provides over white sugar. My pie cracked in the pie because I cooked it at too high of a temperature. 400 is a good happy spot.

I used a gluten free crust from Whole Foods. I don’t ever do things gluten free, but the crust is a total winner.

This recipe is far easier than it sounds.

The Season's Favorites

Ben Ashby

My favorite time of year is fall. I love all things fall — football, hot cider, chai tea, bonfires, and gold, yellow, and red leaves. I love Halloween, even though I don’t often dress up for Halloween — I have fun dreaming up Halloween costumes (my kids won many contests!). I love Thanksgiving, for the simple reasons of cooking our most requested recipes (and trying out some new ones) and gathering together with family and friends. This time of year, when I go out in the early morning to feed the cats, I enjoy spotting freshly woven webs, glistening with morning dew and my mind always drifts to — ”When the frost is on the punkin“ — Happy fall, Y’all!

Screen Shot 2020-10-29 at 4.01.27 PM.png

Fresh Apple Cake

1⁄2 cup shortening
2 eggs well beaten
1⁄2 teaspoon nutmeg
2 cup chopped, peeled Golden Delicious Apples
2 cup sugar
2 cup self-rising flour
1 teaspoon cinnamon
1 cup chopped dates
1 cup golden raisins
1 cup blackberry jam
1 cup chopped black walnuts

Cream together shortening and sugar; add eggs one at a time. Sift together flour, nutmeg and cinnamon. Add this slowly to creamed mixture. Stir in nuts, dates, raisins, jam and apples. Bake in well greased, floured tube pan for 1 hour 20 minutes at 325, or until knife inserted comes out clean.

Icing

1⁄2 cup butter
1 cup brown sugar
1 3⁄4 cup powdered sugar 1⁄4 cup milk

Melt butter and brown sugar over low heat, add milk and bring to a boil. Cool, add powdered sugar. Beat until smooth.

Jodie’s Sweet Potato Pie

2 cups of boiled, mashed sweet potatoes 1 tablespoon flour
1 can sweetened condensed milk
1⁄2 teaspoon nutmeg

Generous pinch of ginger
3 tablespoons butter, melted 1 1⁄2 cup sugar
2 large eggs, beaten
1⁄2 teaspoon cinnamon
1 teaspoon vanilla
2 unbaked pie crusts

Preheat oven to 350. Mix all ingredients in large mixing bowl. Pour 1⁄2 mixture into each pie shell. Bake for 30 minutes or until knife inserted in center comes out clean.

Settlers Beans

1 lb ground beef, browned and drained 1 onion chopped
16 0z can kidney beans, drained
1⁄4 c brown sugar

1⁄2 c ketchup
1/2 lb bacon, fried and crumbled 16 oz can pork and beans, drained 16 oz can butter beans, drained
1⁄4 c white sugar

Mix and cook in crockpot.

This is one of my mom’s recipes that I love, with cornbread, in the fall! There is no cook time listed, but if you put this in the crockpot in the morning, you’ll have a satisfying dish for supper! Enjoy.

Fall Drinks from Cozy to Cocktail

Katie Westerfield

Fall Drinks from Cozy to Cocktail

Cheers to the weekend.

It’s the coziest time of the year and we’re celebrating accordingly. Here are all the fall drinks you need to add to your “must try” list. Just trust us.

Eva Kosmas Flores Website

Eva Kosmas Flores Website

Mulled Wine

Eva Kosmas Flores

A classic coming from the kitchen of Eva, so you know it’s a must. Mulled wine is ultimate cozy and all things tasty so hop on this recipe to savor all season and in to winter.

The Ginger with Spice Instagram

The Ginger with Spice Instagram

Apple Caramel Latte Macchiato

Ginger with Spice

What’s not to like? Four very delicious things come together as one and we’re not mad about it. Move over, PSL. (yeah, I said it.)

Platings + Pairings Website

Platings + Pairings Website

Apple Cider Cocktail

Platings +Pairings

Apple cider but take it up a notch. 2020’s Thanksgiving dinner just got a little sweeter with this perfect cocktail on deck.

Half Baked Harvest Instagram

Half Baked Harvest Instagram

The Black Widow Smash

Half Baked Harvest

Cocktail aesthetics 10/10. So pretty. So cozy. So spooky. The crowd pleaser you didn’t know you needed just in time for your Halloween celebrations.

Inspired By Charm Instagram

Pumpkin Old Fashioned

Inspired By Charm

We’re still showing all the pumpkin love, y’all. Can you blame us? This collab is checking off all the boxes.

Spoon Fork Bacon

Hot and Creamy Butterbeer

Spoon Fork Bacon

Fall dreams in a cup, please and thank you. Rich, warm, and cuddle up with a good book worthy. Let’s be honest, that’s what we’re looking for.

For more stories and favorites like these, make sure you’re subscribed to our newsletter and following along on Instagram.